Learn how to use the new Cricut Watercolor Markers and Watercolor Cards and tips for choosing the best designs with them.
I love seeing the new products released from Cricut and appreciate how innovative the brand is in coming out with new machines, materials and products for us to try out. Cricut Watercolor Markers will draw your design using the Cricut machine. Once you remove it from the cutting mat, add a splash of water with the Water Brush to make your own watercolor masterpiece!
If you want to try new mediums in your crafting, try experimenting with watercolour effects in your card making!
Cricut Watercolor Marker Set
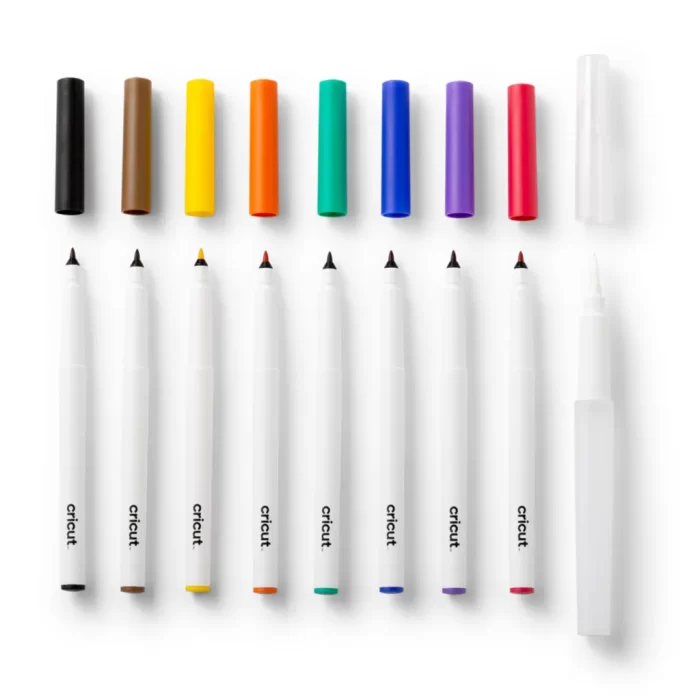
The watercolor markers came in a set of 8 Watercolor Markers (1.0 mm) in Green, Blue, Purple, Red, Black, Brown, Yellow, Orange. There is also an included Water Brush (4.0 mm). The water brush is used after the cards have been drawn to create freehand watercolor effects. The water brush is not used with the machine.
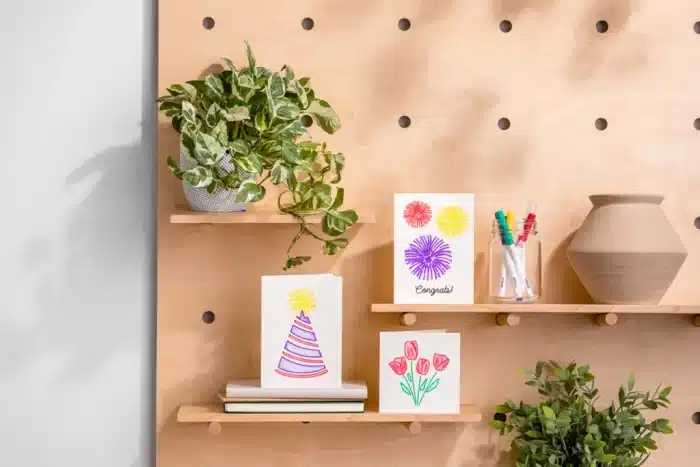
Cricut Watercolour Cards
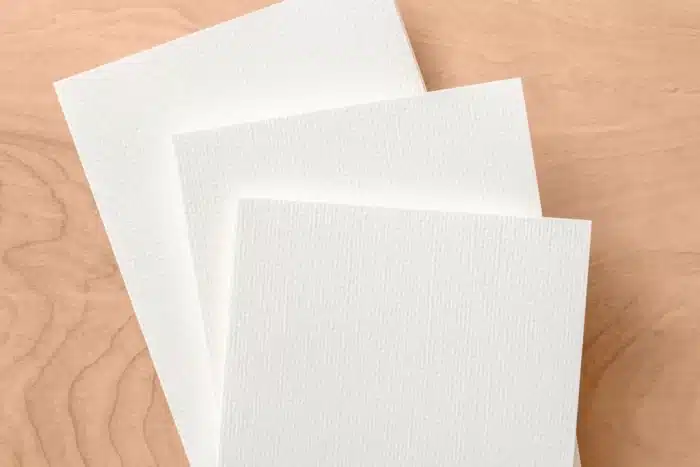
The Cricut watercolor cards are made with cold-pressed watercolor paper and can be used with any Cricut machine. The watercolor cards are desined to be used with the Cricut Card Mat. There is an individual card mat that is used with the Cricut Joy machine, and a 2×2 card mat to use with the Cricut Maker.
What sizes do the watercolor cards come in?
The watercolor cards are available in R20 – 4.25 in x 5.5 in, R40 – 4.75 in x 6.6 in and S40 – 4.75 in x 4.75 in. If you are using the Cricut Joy to make your cards, use the smallest card size R20 to fit to the card mat.
Note: R40 and S40 cards are too large to fit on Cricut Joy Card Mat. They should be used with Cricut Card Mat 2 x 2 only.
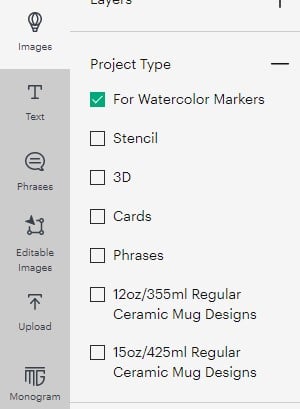
Which designs to use for Cricut Watercolor Markers
Images and projects have been designed specifically to use with Watercolor Cards and Markers. Search Watercolor Marker in Cricut Design Space image search.
Most images that are made for drawing can be used as well. Filter the images in search for draw or cut and draw.
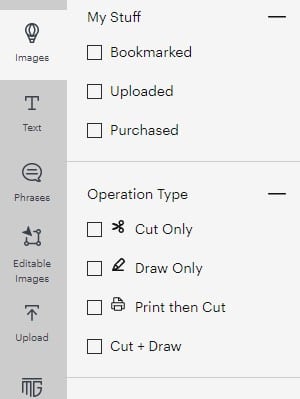
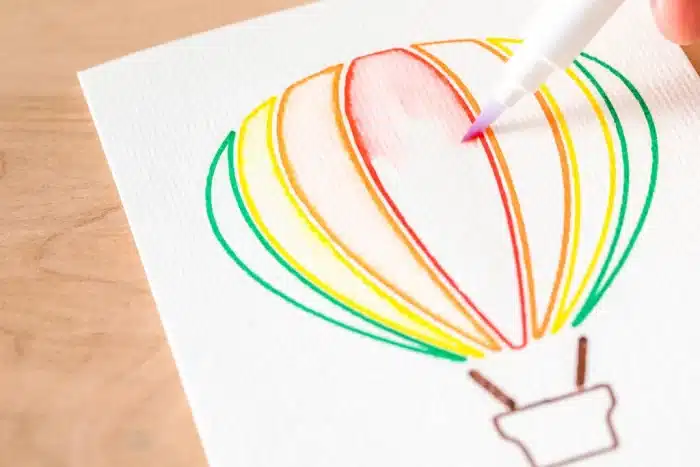
Many other designs and images can be used as well. Look for simple line art with multiple colors. It works best if the artwork has space between the colors, or the colors don’t touch. This helps the colors to not bleed together when adding the water and blending.
Pro tip: Simple line art with multiple colors works best. Find artwork where lines of different colors don’t touch, or colors may bleed together when blending.
Try out one of my own designs! If you have a cricut access subscription they are included for you to use! Check out my design space profile here.
Blending Tips
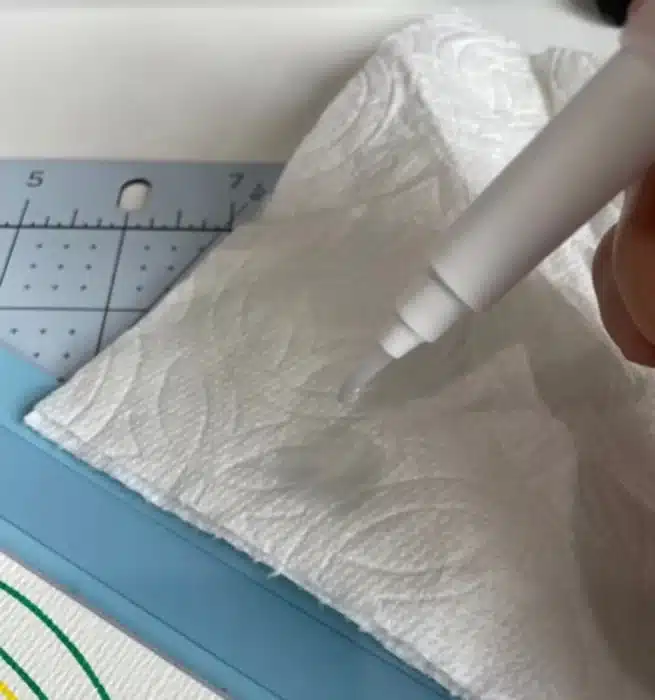
Fill the Water Brush (which is included in the marker set) with water. Squeeze lightly to push the water out and dampen the bristles. Dab any excess water on a clean towel, you don’t want it dripping water.
Using the Water Brush, start tracing along the artwork on the inside of the image.
To fill in larger areas use short strokes to pull the color in.
To swithc colors simply wipe the brush onto a paper towel while squeezing to apply more water.
When you are happy with the result allow the card to dry completely. I let mine sit for a few hours, even over night.
How To Use Cricut Watercolour Markers And Water Brush Set
Supplies Needed:
- Cricut Joy
- Cricut Design Space
- Cricut Watercolor Cards
- Cricut Watercolor Markers
- Cricut Water Brush (included in Watercolor Markers pack)
- Water
- Clean towel
Directions To Use Cricut Watercolor Markers
Directions For Cricut Watercolour Markers On Cricut Joy
- Open Design Space
Open cricut design space and choose a design. Add the design to your canvas.
- Set operation to draw
Change the operation to draw and select the color of watercolor pens you will be using. This is helpful to have the machine notify you when to switch out the pens during the drawing process.
- Size your image
Resize your image to fit onto the card that you will be using.
- Make it
Select Make It. If prompted to select a load type, choose On Card Mat. Then select Continue/Next. Ensure the Material Size selector matches the size of card you intend to use. Adjust project copies as needed to create multiple copies at once. Select Continue/Next.
- Select material
Select Browse All Materials and choose Watercolor Card.
- Remove cover and attach card
slide card onto the cutting mat from the left side, so the back side of the card is under the plastic. Make sure the card is alighed to the top left corner, flush with the top. When aligned, press the card onto the adhesive mat.
- Insert mat into machine
FAQ
Yes! You can use watercolor paper as well. Regular printer copy paper will wrinkle after the water is applied and will not look pretty.
Yes, but be sure to only apply water to one side at a time.
Happy Crafting!


Leave A Reply!