The Pianos
I got a piano from a family friend, and it worked well but the color made my house feel too orange. My husband made me banish it to the office, but I hated playing in such a small room. I decided it was going to live in the living room and I was going to paint it. I was a bit chicken to tackle the job, but decided to tackle the project with my sister in law, Bree. We both hemmed and hawed, encouraging each other to go with out gut instincts on color. Would we get sick of it? Would we hate it? Are we ruining our pianos? These were all thoughts running through our heads, but in the end jump in feet first.
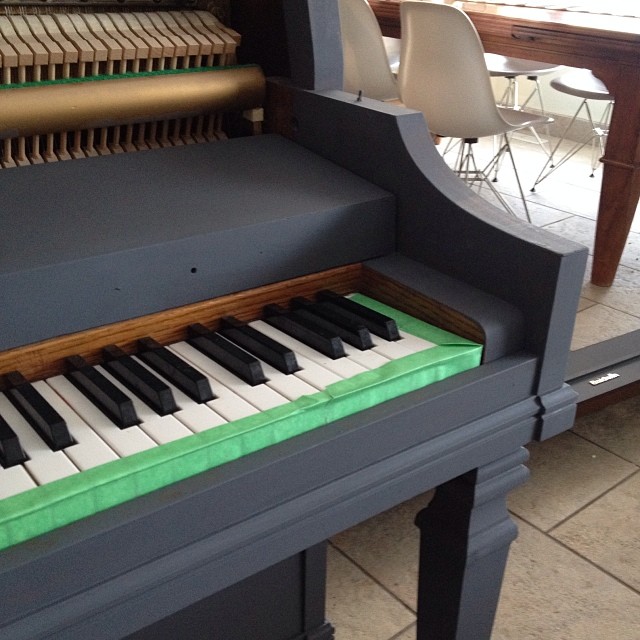
This picture shows a bit of the original color, as well as the solid paint color.
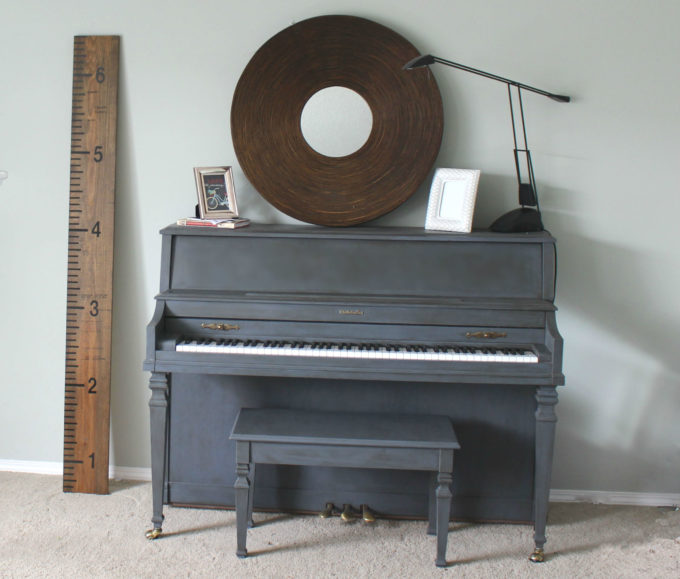
Here is the finished painted piano.

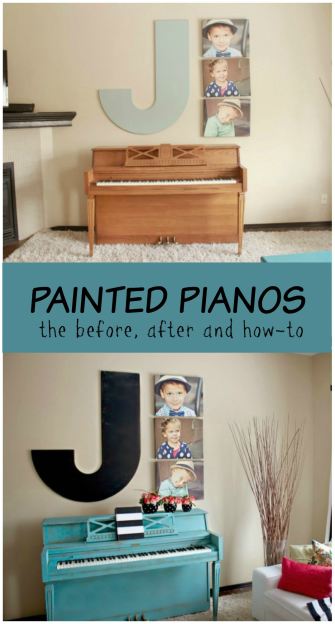
Here is Bree’s piano before.
And here it is after.
We used the Annie Sloan chalk paint. Mine is a mix of violet and graphite, with dark wax to blend it a bit darker. Bree’s piano is Duck Egg Blue.
In order to best express my feelings about this project, let me tell you all my moments of stress and happiness.
- I paint the piano and am so happy with how quick it dried, and how smooth it went on. No sanding required.
- I proceed to apply the dark wax. It terrifies me, as it dries much faster than the paint does. It doesn’t blend in as easy as I thought.
- Google videos of people using the paint, and no alternate ideas come up.
- Panic.
- Go out, and buy mineral spirits, the Annie Sloan brand of brush, and her idea book.
- I love the brush because it applies the paint so much more evenly than the basic brush I was using.
- Use the mineral spirits to attempt to blend in the dark wax. I try to blend with the clear wax as well. I think the clear worked better.
- Realize that what constitutes panic in my home, actually looks pretty great. Annie’s book has a lot of projects with chippy paint, many colors, distressed, etc. I love the uneven finish as I was going for more a matte finish where it would show smudges and such.
Overall, I love the chalk paint. I love that no prep or prime was required to use it. It dried fast, and a little paint went a long way. In fact, Annie will tell you on her site to add water to it. I love that.
For beginners (thats me) just do the clear wax. Once you feel confident in that, THEN venture into the darker wax. Or, attempt the darker wax on a small piece. Starting on a piano wasn’t the best idea because it was tricky to keep in consistent on each section while I was still figuring out how to apply it.
I recommend getting the Paint Transformations book. It explains a lot of the looks on projects and how to accomplish them. I wish I had this when I first started. There are a lot of projects listing which colors were used and the story behind them.
Have you ever used Annie Sloan Chalk Paint? I admit, it feels like a big investment, but the end results are what make the project feel more professional in its looks. My next project? My moms dining room hutch. I am thinking paris grey?


Comments & Reviews
Brenda says
I learned that it’s necessary to apply a layer of clear wax before applying dark wax. This might have helped with your blending troubles.
Brooke says
I found that out as well. I ended up repainting it in a few places then going for the clear wax and again with the dark. Rookie mistake! Thanks for the heads up though. Any advice on blending after you messed it up?
Brenda says
I learned that it’s necessary to apply a layer of clear wax before applying dark wax. This might have helped with your troubles.
Paula says
Hi! Not sure you still read comments on posts this old. I have a question: Did painting the pianos change the quality of the sound? That’s what I am most afraid of. We have an inconsistent white piano that was probably already painted once but could really use a do-over. But don’t want to ruin the sound.
Brooke says
I haven’t noticed any changes in the quality of sound. We had a couple sticky keys before painting. They are still sticky. I didn’t paint anywhere near the sound board or the keys themselves. My piano wasn’t in the best condition to be begin with so I was willing to take a bit of a chance.