Want to learn how to make a kumihimo bracelet? Grab some yarn in your favorite 7 different colors, a DY kuimihimo disc, and get crafting!
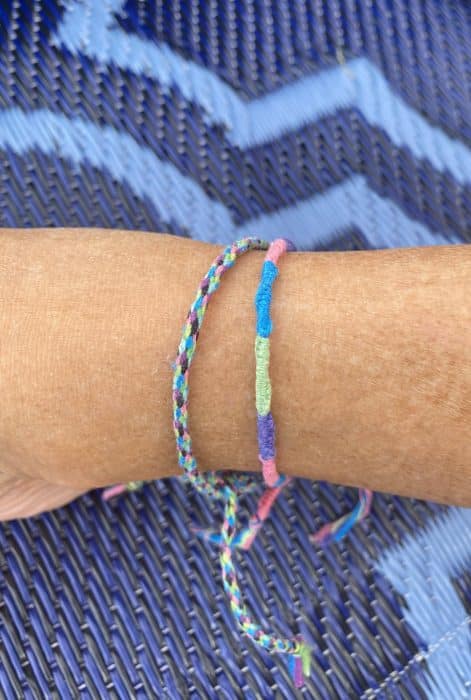
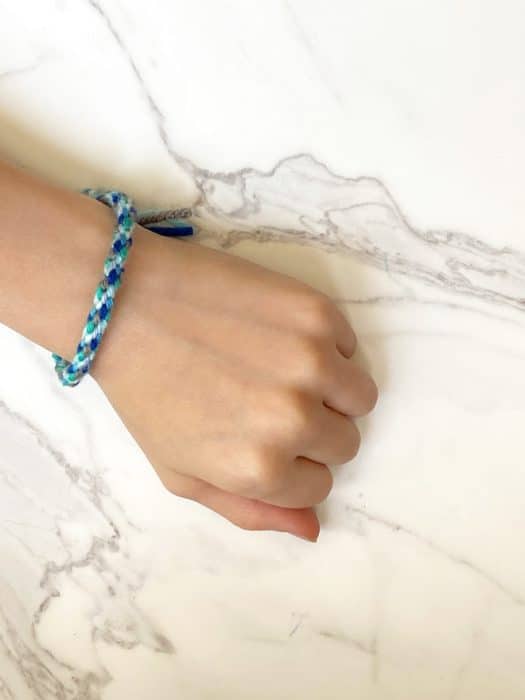
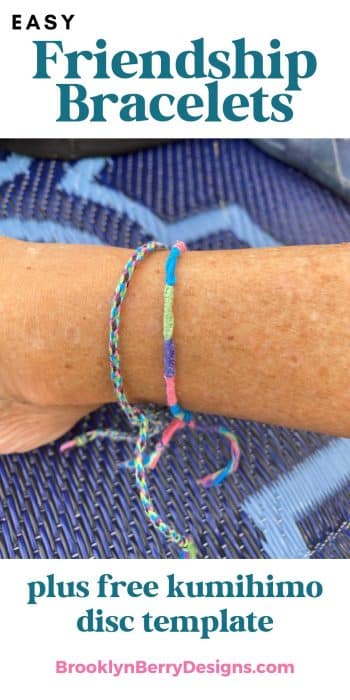
If you are looking for an easy pattern to use when making friendship bracelets, the kumihimo braid is a great project to start with. My kids always call these Jellyfish Bracelets because the strings hanging down remind them of jellyfish! Here is the easy way to start making braided kumihimo braclets.
What Is A Kumihimo Bracelet?
Kumihimo is the Japanese word for “gathered thread”. The verb kumu means to braid
and the noun himo is a cord. This braiding technique forms a rope style bracelet. It is tied on a loom that can be either round or square, depending on the kumihimo bracelet patterns you are using.
Making kumihimo or Jellyfish Bracelets is a great activity in the classroom. I find it works best for grades 3 and up as a quiet activity after students finish their work, or as a craft club or indoor recess activity. This 7 strand braid is perfect for beginners because it can be stopped and started without losing your place. The loom will keep your strands in place so you know just which step you need to start with after a break in crafting.
Get more craft ideas: 25 Fun And Easy Summer Crafts For Teens
HOW TO MAKE A KUMIHIMO BRACELET
Kumihimo Supplies
- Round Kumihimo Disk
- Satin cords, embroidery thread, yarn, etc.
- Bobbins (optional for extra long length)
- Sharp scissors
Tips For Younger Kids Making Friendship Bracelets
If younger kids (like my 7 year old) are making bracelets I recommend using basic craft yarn. Because yarn is thicker than embroidery floss the bracelet works up much faster. I find any embroidery thread works well for this project, but does take longer to see progress.
Another option for a faster embroidery thread bracelet is to double up your strands of thread. This technically makes it a 14 strand bracelet, but you treat it just like a 7 strand. This just makes a thicker braid that works up a bit faster.
Get even more tutorials on how to make rainbow loom bracelets!
Make Your Own DIY Kumihimo Disc
What makes this kumihimo project so easy is that you can use so many different discs. Foam kumihimo discs are available at the dollar stores, as well as at the local craft store.
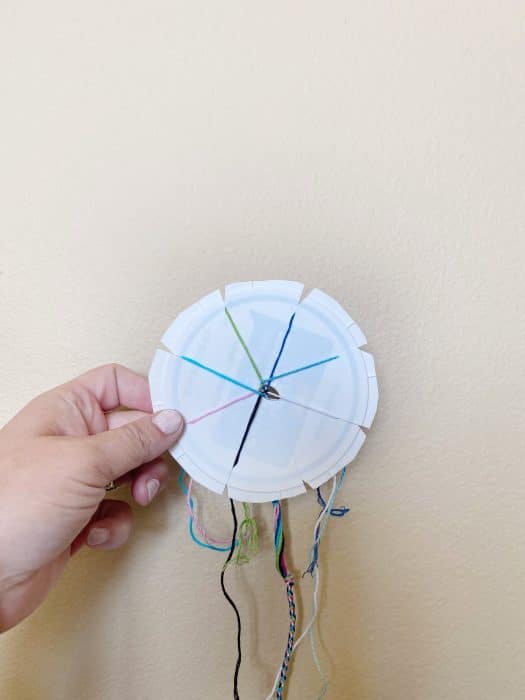
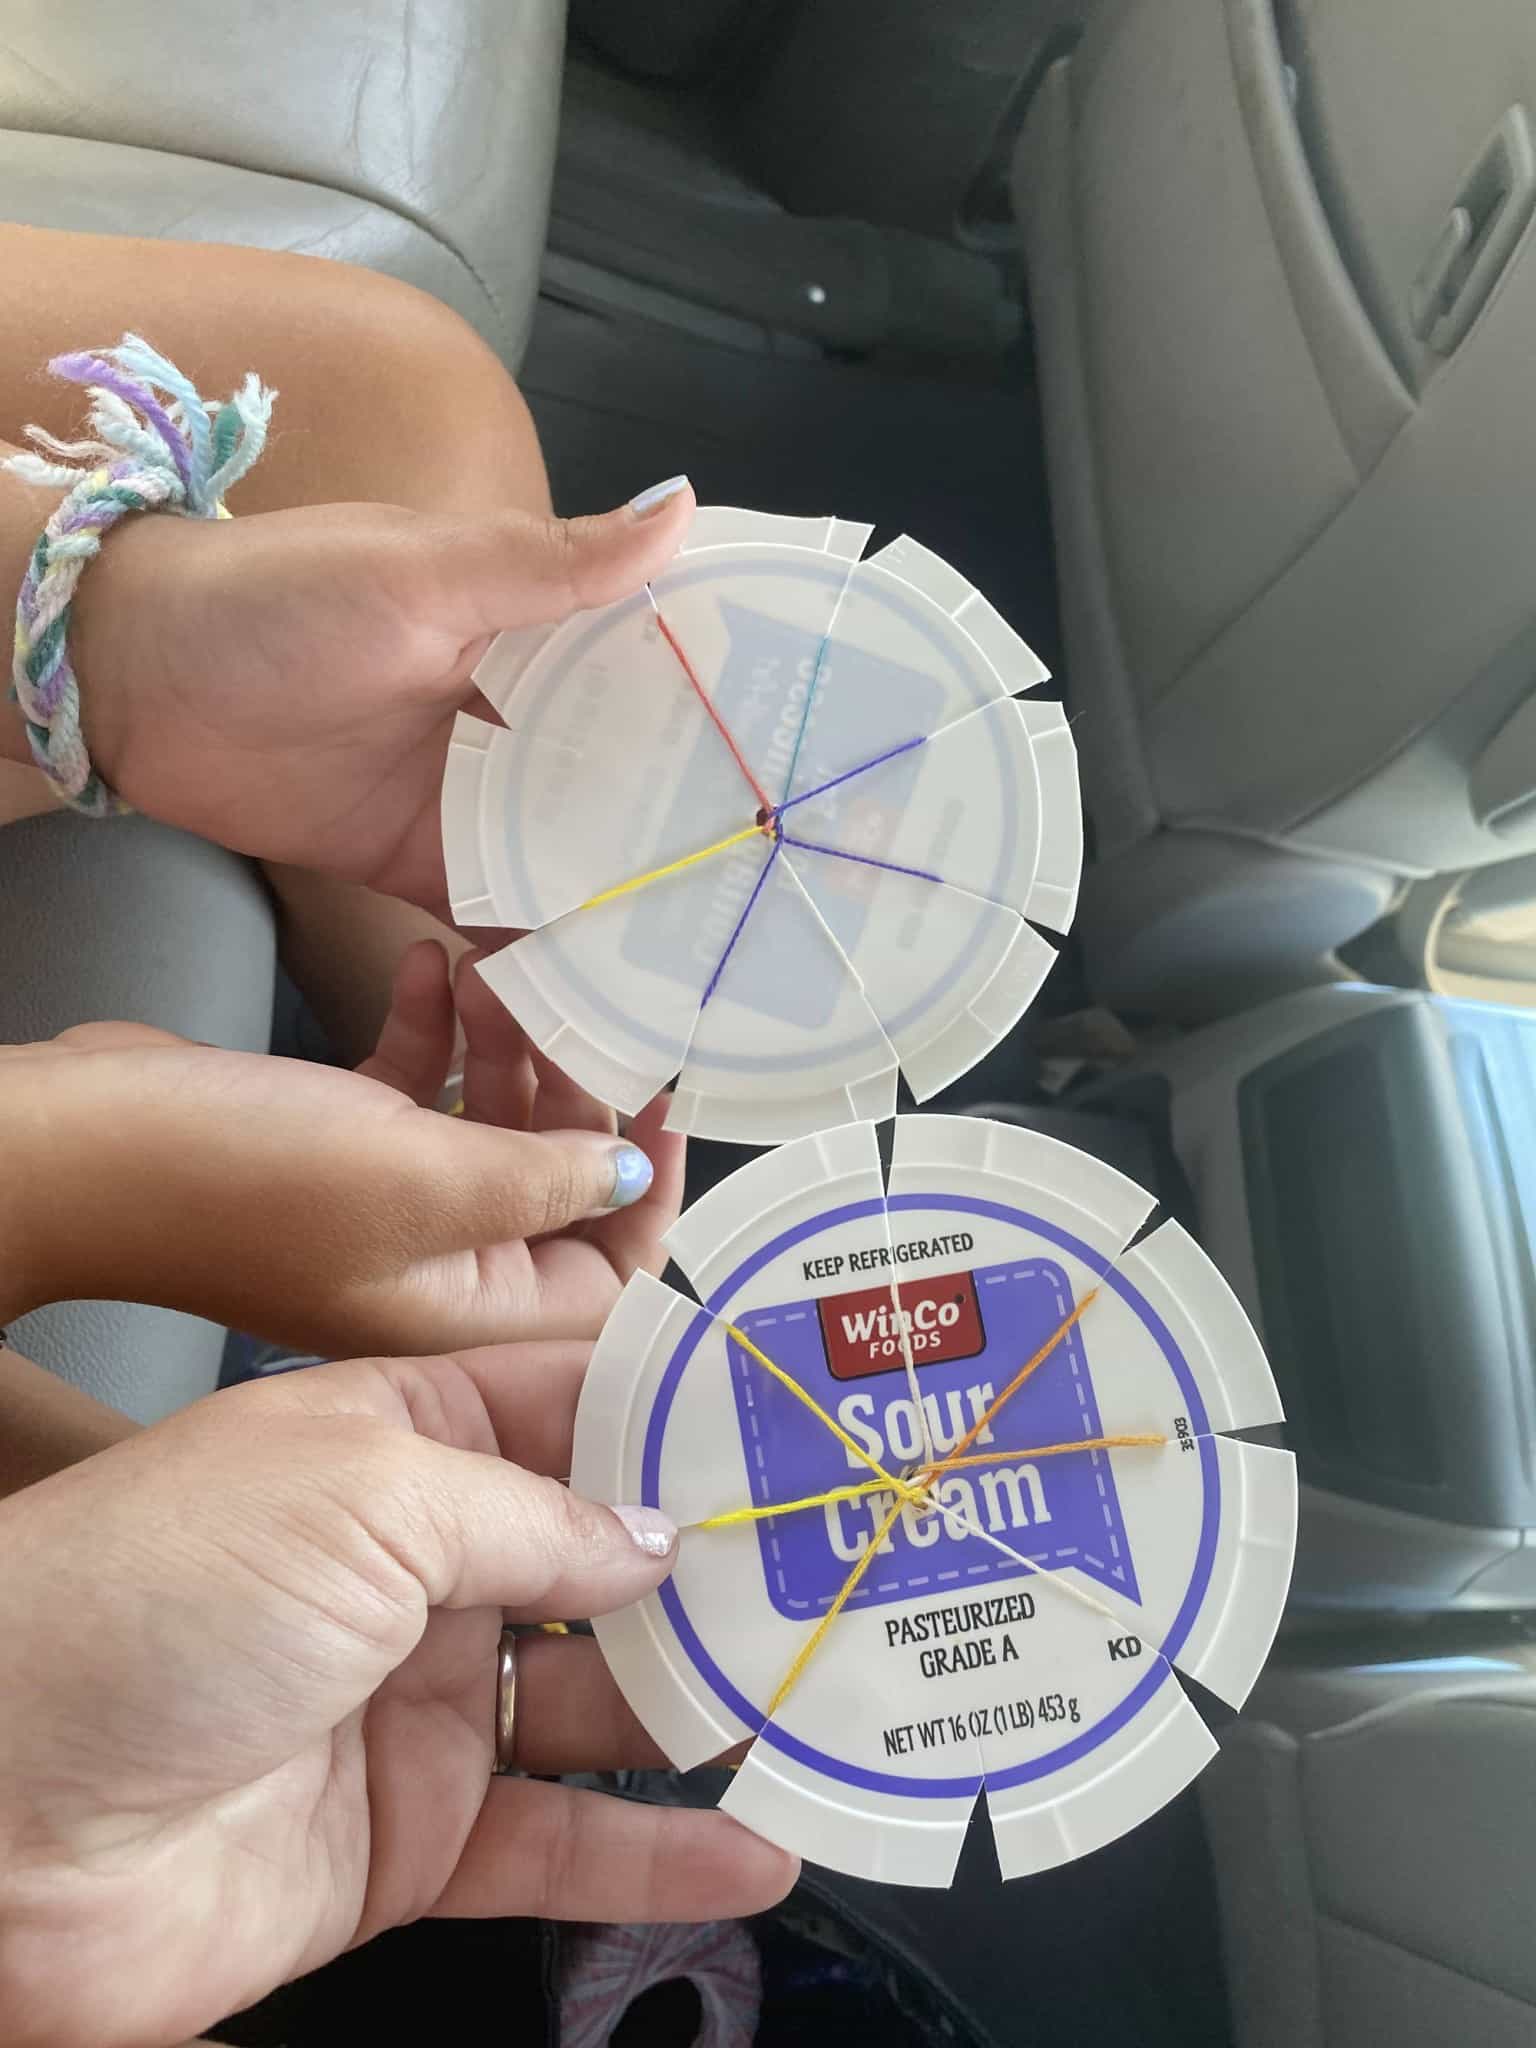
These discs are nice to have, but if you are crafting on the go you can always make your own! Grab a recycled piece of cardboard, a container lid, or a paper plate.
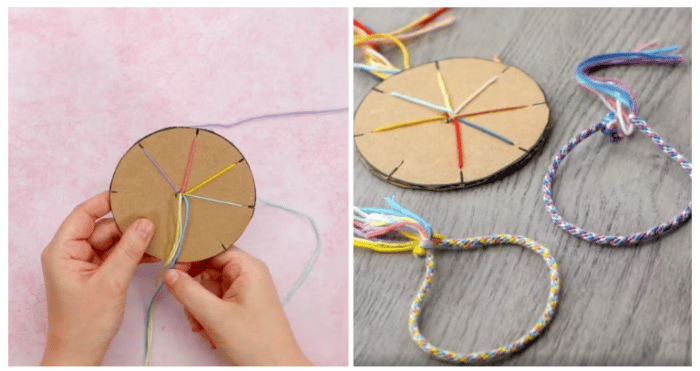
Trace a circle onto a piece of cardboard. Cut out the circle and cut 8 small slits evenly spaced around the edge. Use a pencil to poke a hole into the center of the circle.
• Use your pen or pencil to poke a hole through the center of the circle
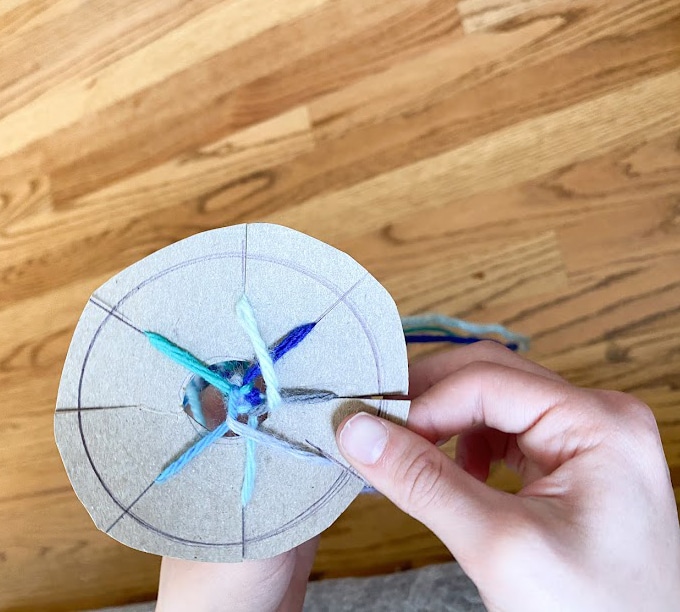
For this beginner “Jellyfish Bracelet” you don’t need any numbers or dots.
How To Make The Bracelet
- Gather 7 strands of embroidery floss in the colors of your choice. Cut each of the solid colors to 20″ long strands for an adult size and 16″ for kids.
- Knot the strands together leaving a tail and place the knot into the center hole of the round disc.
- Place one piece of thread into each slot leaving one slot empty. Turn the disc so that the blank slot is in front of you.
- Counting three strings to the left (clockwise), pick up that third string and move it to the empty spot. Rotate the loom again so that the new empty slot is in front of you.
- Repeat over and over again.
- Run your fingers through the hanging threads every so often to keep them from getting tangled.
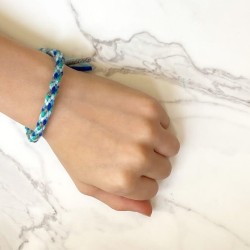
- When you have reached the desired length tie the ends into a knot and finish the way you like best.
Finishing options include adding clasps, gluing end caps with a clasp, or just tie it into a knot!
Jellyfish Kumihimo Bracelet
Equipment
- 1 Kumihimo Disc
- 1 Pair of scissors
Materials
- 7 pieces yarn or thread
Instructions
- Grab your disc (or make your own) along with the required supplies.

- Gather 7 strands of embroidery floss in the colors of your choice. Cut each of the solid colors to 20" long strands for an adult size and 16" for kids.
- Tie a knot and place into the center hole of the disc.
- Place one piece of thread into each slot leaving one remaining space empty.
- Turn the disc so that the blank slot is in front of you. Count three spaces to the right and move that string to the empty space.
- Repeat this process (counting 3 spaces and moving that string) until the bracelet is the length that you wish.
- Run your fingers through the handing threads every so often to keep them from getting tangled.
- When you have reached the desired length tie the ends into a knot and finish the way you like best.

Have you ever made a Jellyfish friendship bracelet? I would love to see your creations!
Pin for later:

Leave A Reply!