It is time to get painting. A few weeks ago I wrote about my decision to paint over the stripes in my sons bedroom. I was worried about covering the stripes with a solid colour and the lines still showing through. CIL’s free Ask An Expert service, allowed me to ask various paint questions from colour choices to product selection. The CIL Experts gave me some great suggestions on how to smooth out the painted striped walls and hide the lines where the height in paint might be different (especially where the painters tape was placed).
I was excited to get some colour on the wall. But Before I could get to the painting, I had some prep work to do.
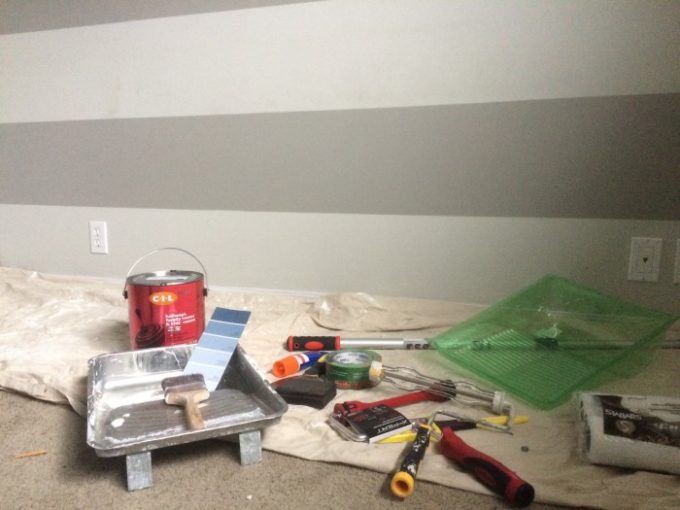
The Prep
Preparing the walls is so critical to getting a professional end result, but it just doesn’t have the satisfying feeling of painting progress. My preparations for this project included removing the outlet covers, taping the side walls and baseboards, and lots of sanding.
How To Paint Over Striped Walls
I used sanding blocks across each stripe line where the different paint colours met up. This is the most cruicial step in painting over striped walls I sanded until I could run my finger over the line and not feel a ledge or bump there. Some rows were faster than others. I wished I had access to a power sander to make the job a lot faster- as long as it would be gentle enough to not sand through to the drywall. When I didn’t think I could sand anymore, the walls were wiped clear of dust with a damp rag.
This paint project had a restricted window of time where I could actually paint. The kids always want to help which isn’t that helpful, so I would wait until the evenings in the hopes that my husband would keep the kids away. And it kind of worked.

The first area to be painted was along the baseboards and cutting on the edges. I was nervous to see if I had sanded enough to smooth out the lines so I painted a small line to see if the stripe transferred through. At this point the boys came in to get ready for bed and wanted to help. I appeased them by painting their first initials on the wall, at which point they insisted I add both of their brothers’ initials and an M for Mom and D for Debbie (grandma).
The second night I began rolling out the paint on the walls. It goes on smooth like butter.
The Paint
I used the self-priming CIL Plus paint, available exclusivity at RONA, Pebble Drift 90BG17/120, which was recommended to me by the CIL colour expert through the CIL Ask An Expert service to cover the stripes. As for the sheen, I went with an eggshell to provide a washable finish that is needed in a kids’ room.
 First Coat is on. Time to grab a stool to reach the top!
After the first coat of paint, I was a bit unsure of the shade of blue. At first it appeared too light and little boy blue. Luckily it dried a bit darker and with a second coat on the walls it looked just like I’d envisioned. In the picture above you will see the bunk beds pushed to the side of the room, this is because painting was done over a couple nights and the boys still slept in their room but there was nothing to be concerned about as the CIL PLUS paint is virtually odorless. Then I realized how great it is to smell nothing in a freshly painted room! Also, I have to say I was impressed with how easy the CIL PLUS paint was to apply.
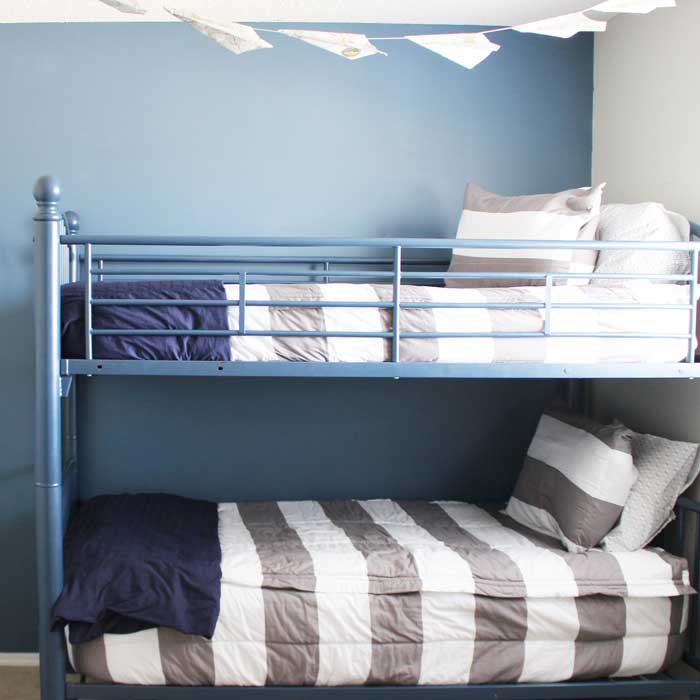 Now that I am done painting the boys’ room, I just need to add some last decorative touches to finish this room. What do you think about the paint colour?
-Brooke
Visit www.cil.ca/ask-an-expert to receive free personalized advice from the CIL team of experts and check out #CILAskAnExpert to follow my journey.
![]()
Disclosure: This post was brought to you by CIL paint via Mode Media Canada. The opinions expressed here are all my own. Thank you for supporting brands that support Brooklyn Berry Designs

Comments & Reviews
Heather says
OMG Brooke I love the colour you picked! It’s looking fantastic!
Leigh says
Were there stripes on only one wall?
Brooke says
Yes in this room I only had stripes on the one wall.