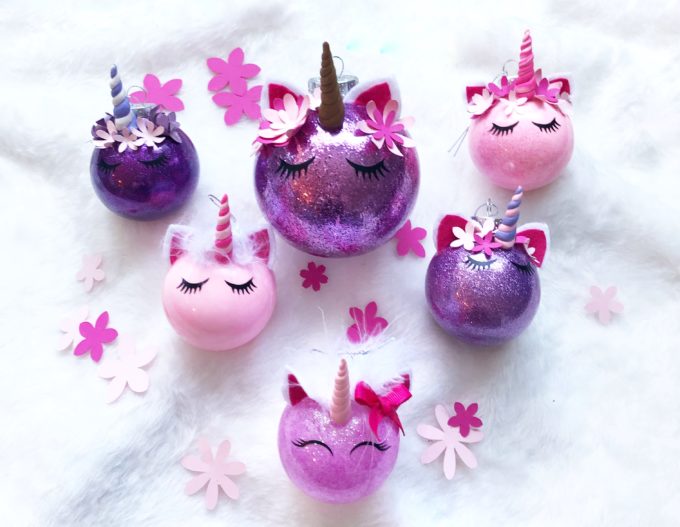
Do you have a lot of teachers and friends to get gifts for this year? Its so hard to find something under One Million Dollars that a person would actually like to receive. These glitter unicorn ornaments are so cute, and can be customized in so many ways. Best of all, they cost about $4 to make!
Supplies Needed:
- Clear ornaments – large or small, glass or plastic. Anything works!
- Polyacrylic
- Fine glitter
- Cricut Explore or Maker
- Vinyl
- Colored paper
- Sculpy clay
- Cricut cut file
- Small funnel
- Syringe or squeeze bottle
Trial & Error on Materials
There are a lot of tutorials and instructions out there, and I am sure many of them are awesome. I had to do a lot of trial and error with this to get the end result I was looking for, and living in Canada I didn’t have as many options for brands and selection. My end goal was to make the glitter unicorn ornaments as cute as possible, without breaking the bank. It has to be affordable and no special order items. So, if you can’t find the same materials in your local store, here are my experiment results to save you some time and money. If you live in the US you can order the correct supplies on Amazon and have them at your door in a day for a reasonable price. Lucky you.
Coating inside the ornament
The first step is to coat the inside of the ornament with polyacrylic. I used whatever I had in my storage room, it was super old and probably not mixed well. It worked. Others have used floor polish but I found it to not coat as thick, so the ornaments were a bit more transparent when finished. Swirl the polyacrylic inside the ornament until everything is coated. Set the ornament in a cup and let any excess drip out. Let it sit draining in the cup for about 10 minutes. This is the tricky part. If you get glitter in there too quickly it makes a soupy mess that never dries. Ask me how I know…
Add the glitter inside the ornament with a small funnel and swirl it around. I prefer to swirl first and then cover the top and shake it. It is a sensory experience! I tried both fine and thicker glitter and they worked equally well. Go with your preference.
Types Of Clay For Unicorn Horns
Again, this was a product experiment. I tried a three different brands or types at the dollar store. Option 2 was a foamy bubbly kind that air dried, but was too soft and the colors didn’t mix (this is similar). Option 2 was another air dry clay that reminds me of what I used in ceramics (similar to this). It dried out quickly and felt like concrete when dry, and crumbled easily. Option 3 was an oven baked clay that only came in two colors. Yellow and green. This option was a polymer clay and it worked the best. The horn was solid but not heavy, perfect qualities for a unicorn ornament.
Unicorn Ornament Details
The simple details can be easily cut on the Cricut. They are small in size but make a big impact on how the magical the unicorn ornaments feel. Here is the design space file for what I used. The smaller flowers were fast to cut out, and no real shaping was required. Small and simple for the win!
Instructions
Cut out your ears, lashes, and flowers with the Cricut. Shape your horns using the clay and bake them in the oven according to the directions on your clay. Use hot glue to attach the horn, ears, and flowers. Peel and stick the vinyl eyelashes for the finishing touches! Your done!
Project Modifications
If you want to expand beyond glitter unicorn ornaments, you can use the same concept to glitter the ornament, but add names, sports teams, or characters to make the perfect gift. Thoughtful, personalized, and under One Million Dollars!
Are you looking for more ideas for gifts to make with your Cricut? Check out some amazing projects here:
Do you have a questions about the Cricut machine? I answer the most frequently asked questions here!

Looking for more projects you can make on the cricut? Click here for all my cricut projects.

Comments & Reviews
Jessica says
Adorable! Thanks for sharing!
Sofia says
Thank you for the information 🙂