• Skip to primary navigation
  • Skip to main content
  • Skip to primary sidebar

Brooklyn Berry Designs

DIY and Design for Creative Moms

  • Family Fun
    • Games & Fun
    • Kids Crafts
    • Lifestyle
    • Book Shelf
  • Crafts
    • Laser Crafts
    • Cricut
      • Cricut Projects
      • Cricut Tutorials
    • Sublimation
  • Holidays
    • New Years
    • Valentines Day
    • St. Patricks Day
    • Easter
    • Mothers Day
    • Fathers Day
    • Summer
    • Patriotic
    • Canada Day
    • Back To School
    • Halloween
    • Thanksgiving / Fall
    • Christmas
  • Digital Downloads
    • SVG Files
    • Printables
  • Shop
  • Brooklyn Berry Designs
  • About
  • Press/PR
  • Blog
  • Shop

Life

Home » DIY Tray Table Transformation #decoartprojects #chalkyfinish

DIY Tray Table Transformation #decoartprojects #chalkyfinish

Created On: May 19, 2015  |  Updated: August 28, 2017  |   7 Comments

Pin
Share
Post
90Shares

This post may contain Amazon and other affiliate links. Using these links, I earn a small commission at no additional cost to you.

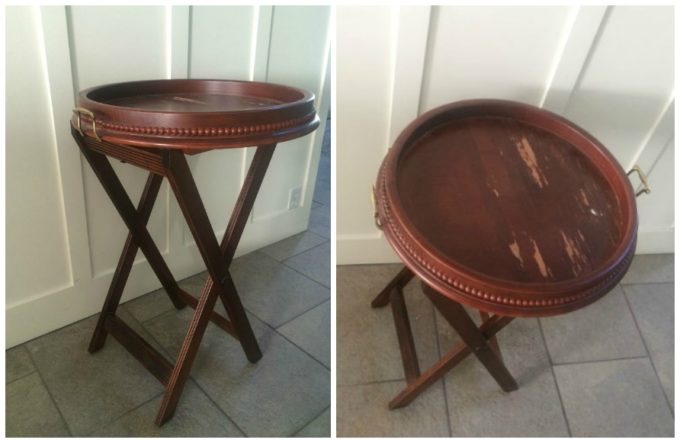
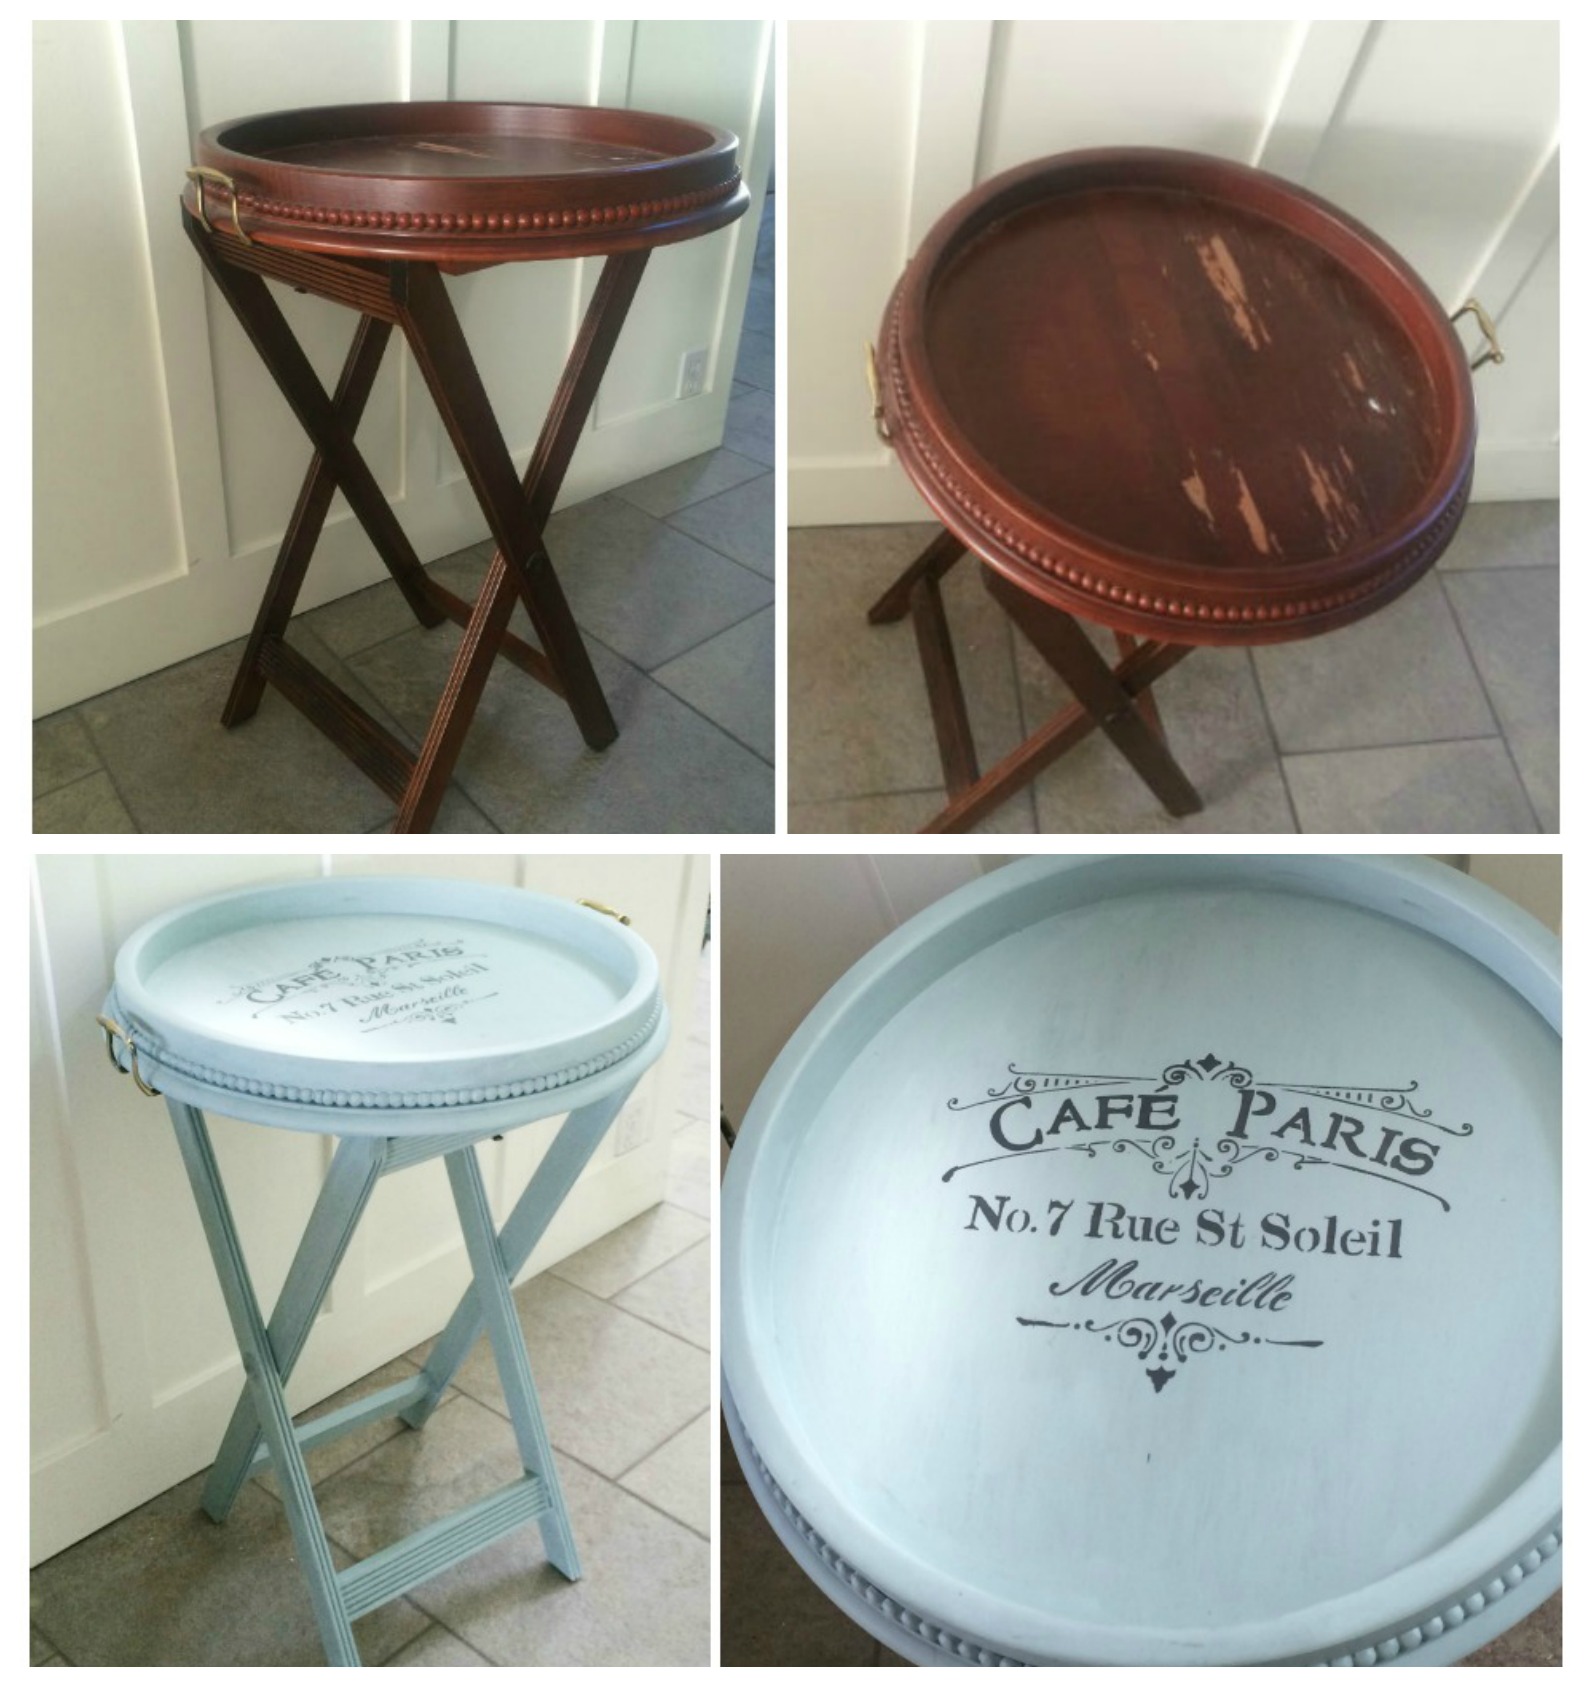
This tray table was used as a night stand with the rest of the bedroom set in my parents bedroom for the last 15 ish years.  When the big move happened, and the lamp, clock, and accessories are removed we began to notice how much wear and tear this poor little table has got over time.  This made it the perfect opportunity to refinish and paint.

In order to avoid having to sand down and remove carefully the finish on the table, I just lightly sanded the areas where the finish was chipping away.
Tray Table Transformation before

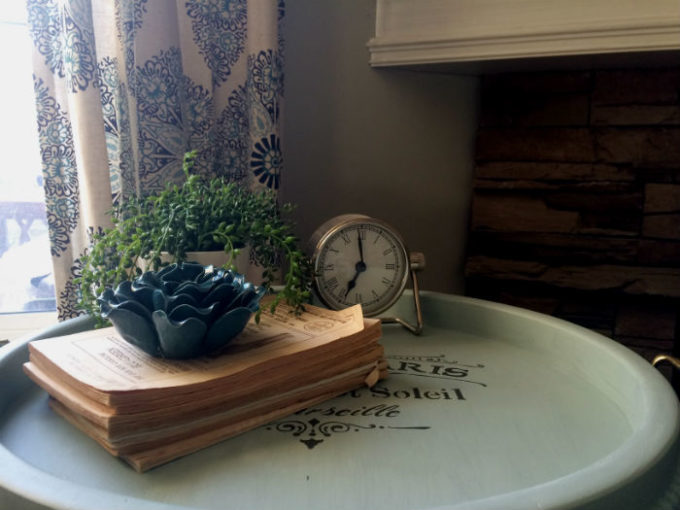
I used the DecoArt Chalky Finish paint in the color Vintage and applied two coats to the tray and the stand.  I used the small brush to get into the grooves on the table legs, which was the hardest area to get good coverage on.  When all was dry, I added the french cafe design with a vintage french stencil.

IMG_4414
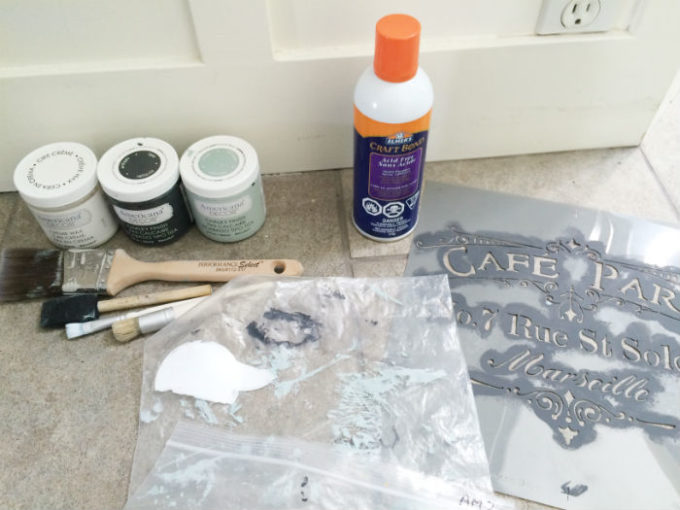
All the supplies used to complete this project.

IMG_4407

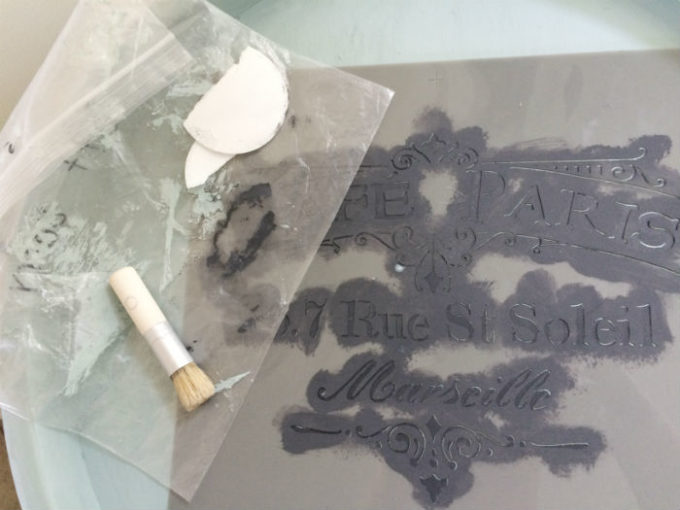
I applied a thin layer of craft spray adhesive and let it dry before lining it up on the tray top.  I was a bit nervous to get the stencil right without it bleeding.  Using a stiff brush I dabbed the paint onto the pattern, and brushed off the excess paint onto a plastic bag I had beside me.  It was that easy and and it turned out pretty good with no bleeding. Easy peasy!  To finish the entire project I used the wax creme all over the entire table.

tray table after

Tray Table TransformationIMG_4430-1

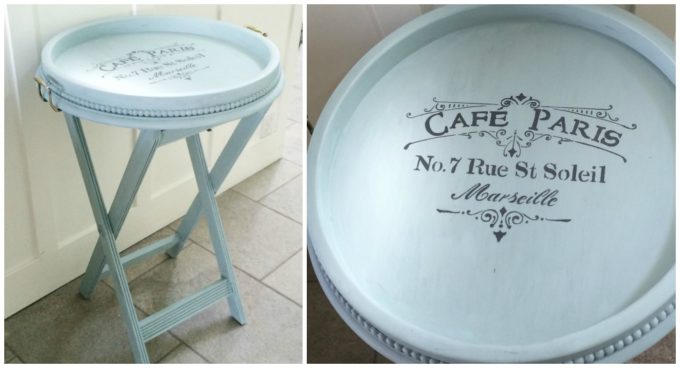
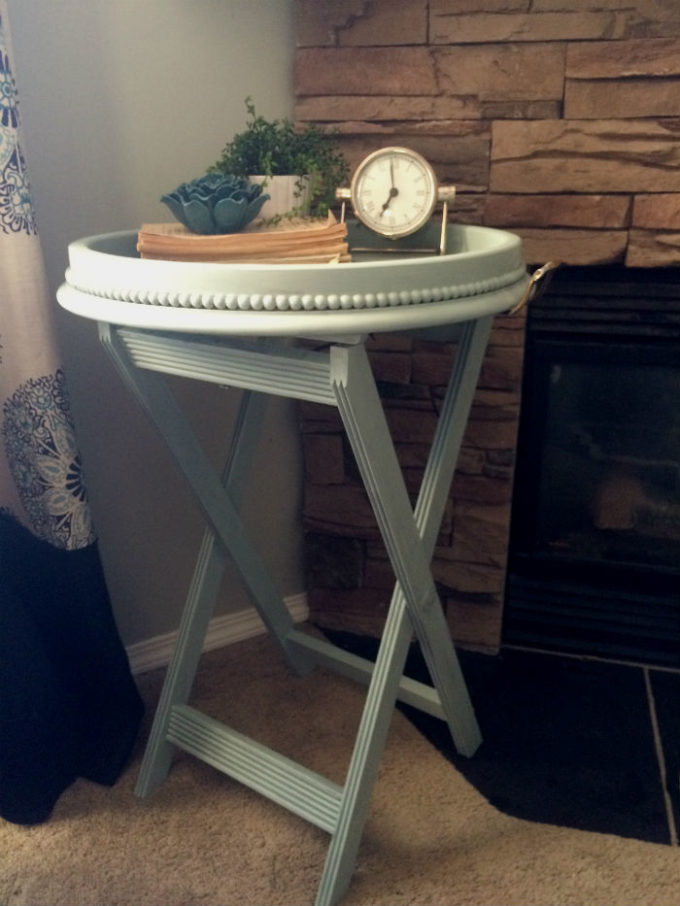
I loved how this little tray table turned out.  My mom even asked to take her table back!  That was the true sign of success for me. I can’t wait to work on another project!  I finished this one in an afternoon, with some drying time after.

If you are thinking about a project, visit the DecoArt Chalky Finish website for more chalk paint ideas and inspiration. 

tray table1

Pin
Share
Post
90Shares

posted in: Life

Previous
Crochet Border & Hemstitch FAQ
Next
Entertaining Kids With Backyard Toys

Reader Interactions

    Leave A Reply! Cancel reply

    Share your thoughts!
    Your email address will not be published. Required fields are marked with *

    RATE THIS!


    This site uses Akismet to reduce spam. Learn how your comment data is processed.

    Comments & Reviews

  1. Heather says

    May 19, 2015

    it is SO pretty! I love how easy it is to do these little projects. They are so much fun.

    Reply
  2. Carolyn ~ homework says

    May 21, 2015

    Love how the table turned out! Thank you so much for sharing your wonderful creativity on The Inspiration Board at homework.
    Have a wonderful and creative day!
    carolyn ~ homework

    Reply
  3. Lisa at Mabey She Made It says

    May 26, 2015

    I love this look. It was a great table to start with, but this finish is lovely. Thanks for linking to the Do Tell Tuesday party!

    Reply

Primary Sidebar

Brooke - Author of Brooklyn Berry Designs.

Brooke is an interior designer and DIY’er who loves all things creative and crafting. She loves to be busy with at least 3 projects on the go and is constantly chatting or singing along to the radio. As a mom to 4 boys, she is always blending creativity and chaos, with some diet coke mixed in. Stick around for the big projects and get 20 little projects in between.

More About Me

Step By Step Guide To Your Cricut!

Level Up Your Cricut Game - Become a pro in 5 days with this free Cricut email course.

Thank you for subscribing!

Let's Get Creative

Subscribe to get free SVG files, Cricut and laser cutter tutorials, fun printables, and easy crafts right to your inbox! Its free!

Thank you for subscribing!

Featured Projects

  • Customize With Cricut Design Space Tools
  • Best Cricut Access Fonts
  • make your own canada 150 waterbottle
    How to upload your own images with Cricut
  • How To Upload A SVG File To Cricut Design Space

Let's Get Creative

Subscribe to get free SVG files, Cricut and laser cutter tutorials, fun printables, and easy crafts right to your inbox! Its free!

Brooklyn Berry Designs Logo

About

  • Brooklyn Berry Designs
  • About
  • Press/PR
  • Blog
  • Shop

Topics

  • Crafts
  • Cricut Projects
  • SVG Files
  • Printables
  • Cricut Tutorials

Holidays

  • New Years
  • Valentines Day
  • St. Patricks Day
  • Easter
  • Mothers Day
  • Fathers Day
  • Canada Day
  • Back To School
  • Thanksgiving / Fall
  • Halloween
  • Christmas
©2025, Brooklyn Berry Designs. About Press/PR Back To Top
Design by Pixel Me Designs
×

Let's Get Creative

Subscribe to get free SVG files, Cricut and laser cutter tutorials, fun printables, and easy crafts right to your inbox! Its free!

Thank you for subscribing!