Bright Kitchen Remodel – DIY version
You move into a new house and want to change a few things. You have 3 young kids, and your husband is working long days. So you wait a while and spread it out over the weekends right? Not for this mom. Wielding power tools and decorating skills, the cabinets were painted, the counter tops replaced or painted into a new finish.
While the out of pocket cash was about $500 there was also the use of airmiles for gift cards to a home building store. Also, just really thrifty purchases.
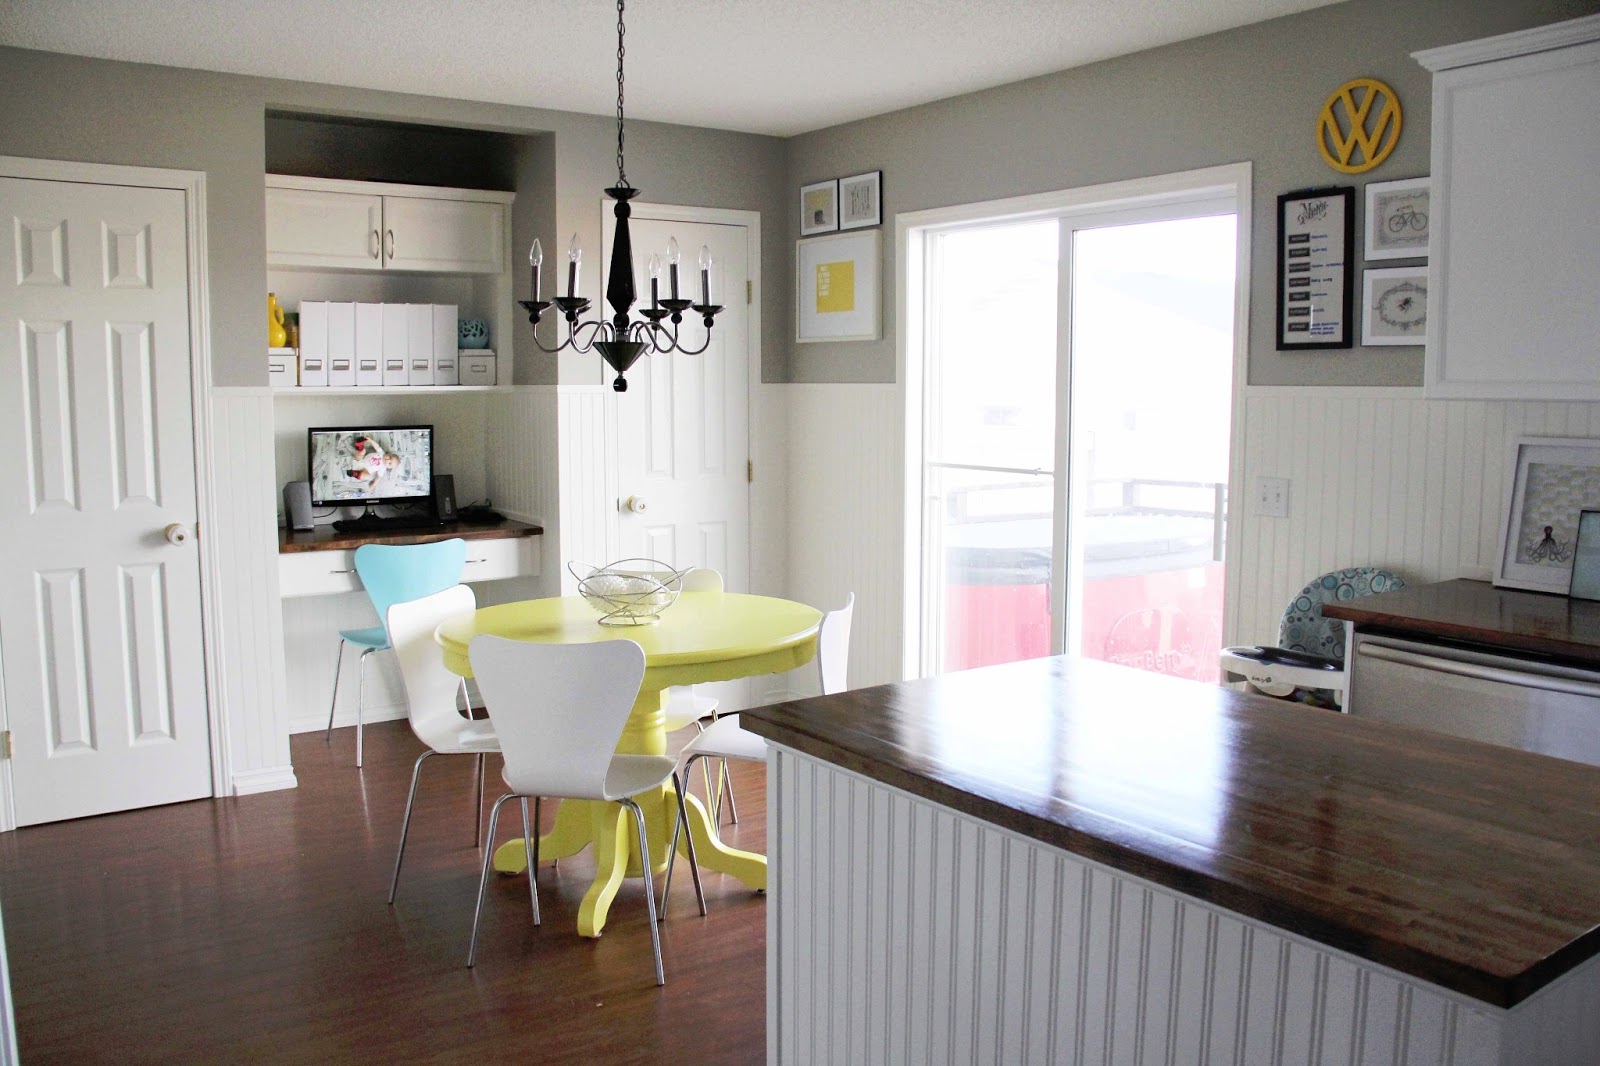
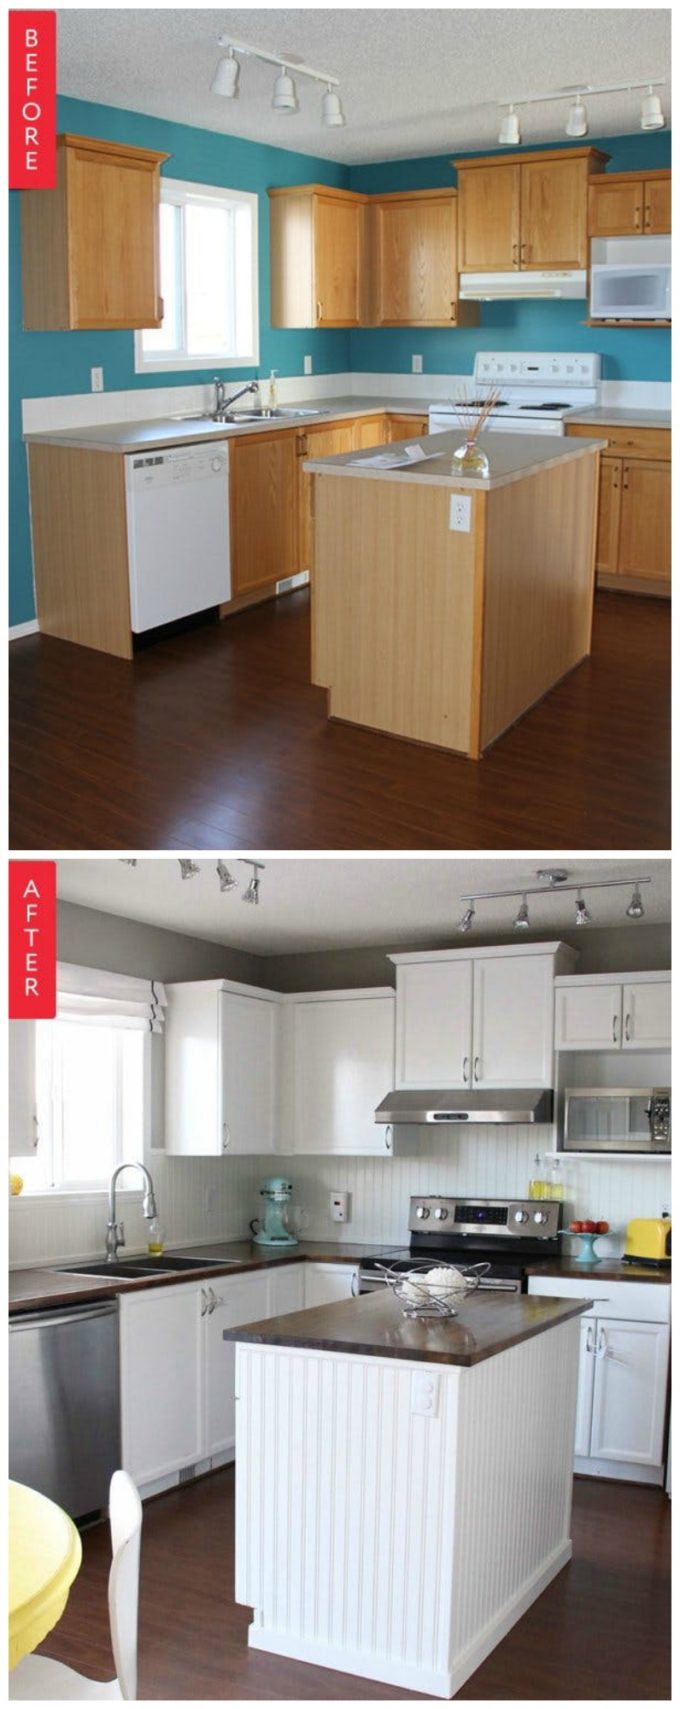
This bright white kitchen looks so modern, you would never know how it started out.
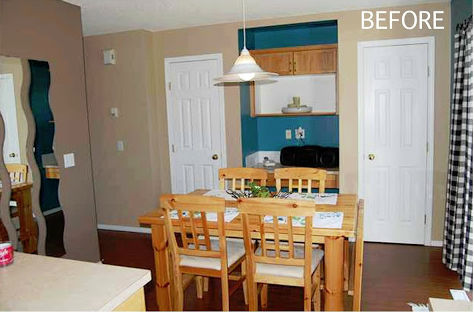
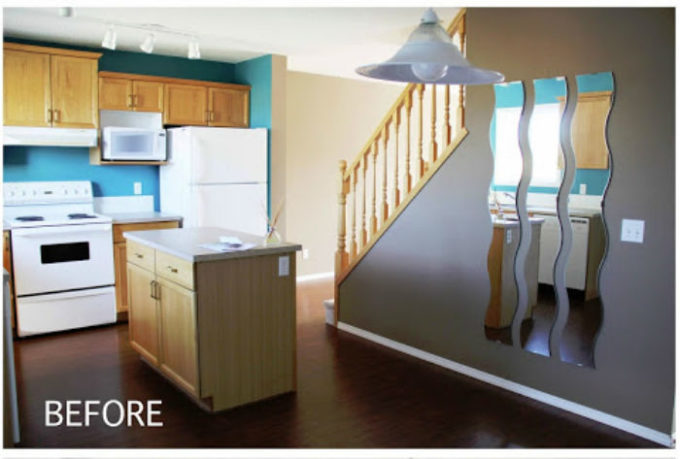
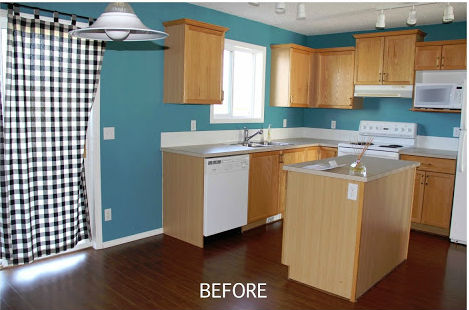
Boring beige walls and an odd teal accent color in the desk space looked fine before, but nothing to write home about.
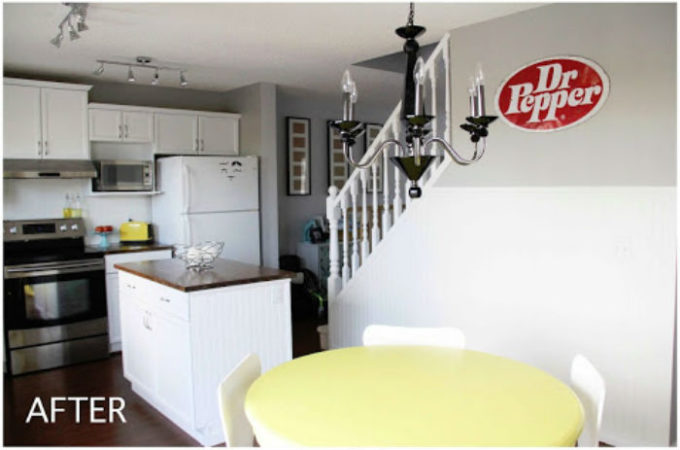
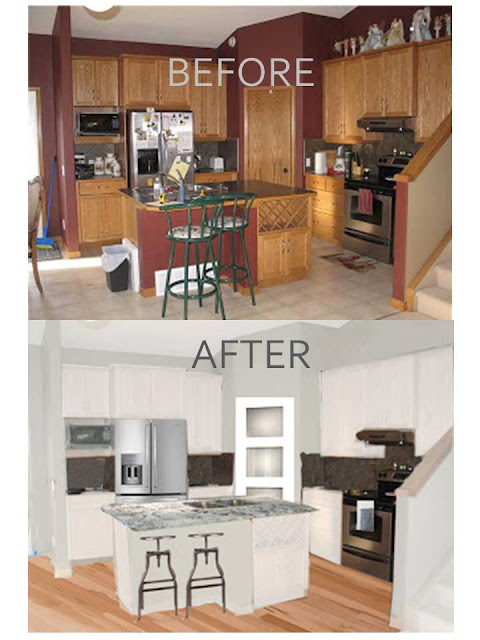
I love the painted railings – what an inexpensive update! You can see here, there is a new stove but the fridge is still the original white. Budget budget!


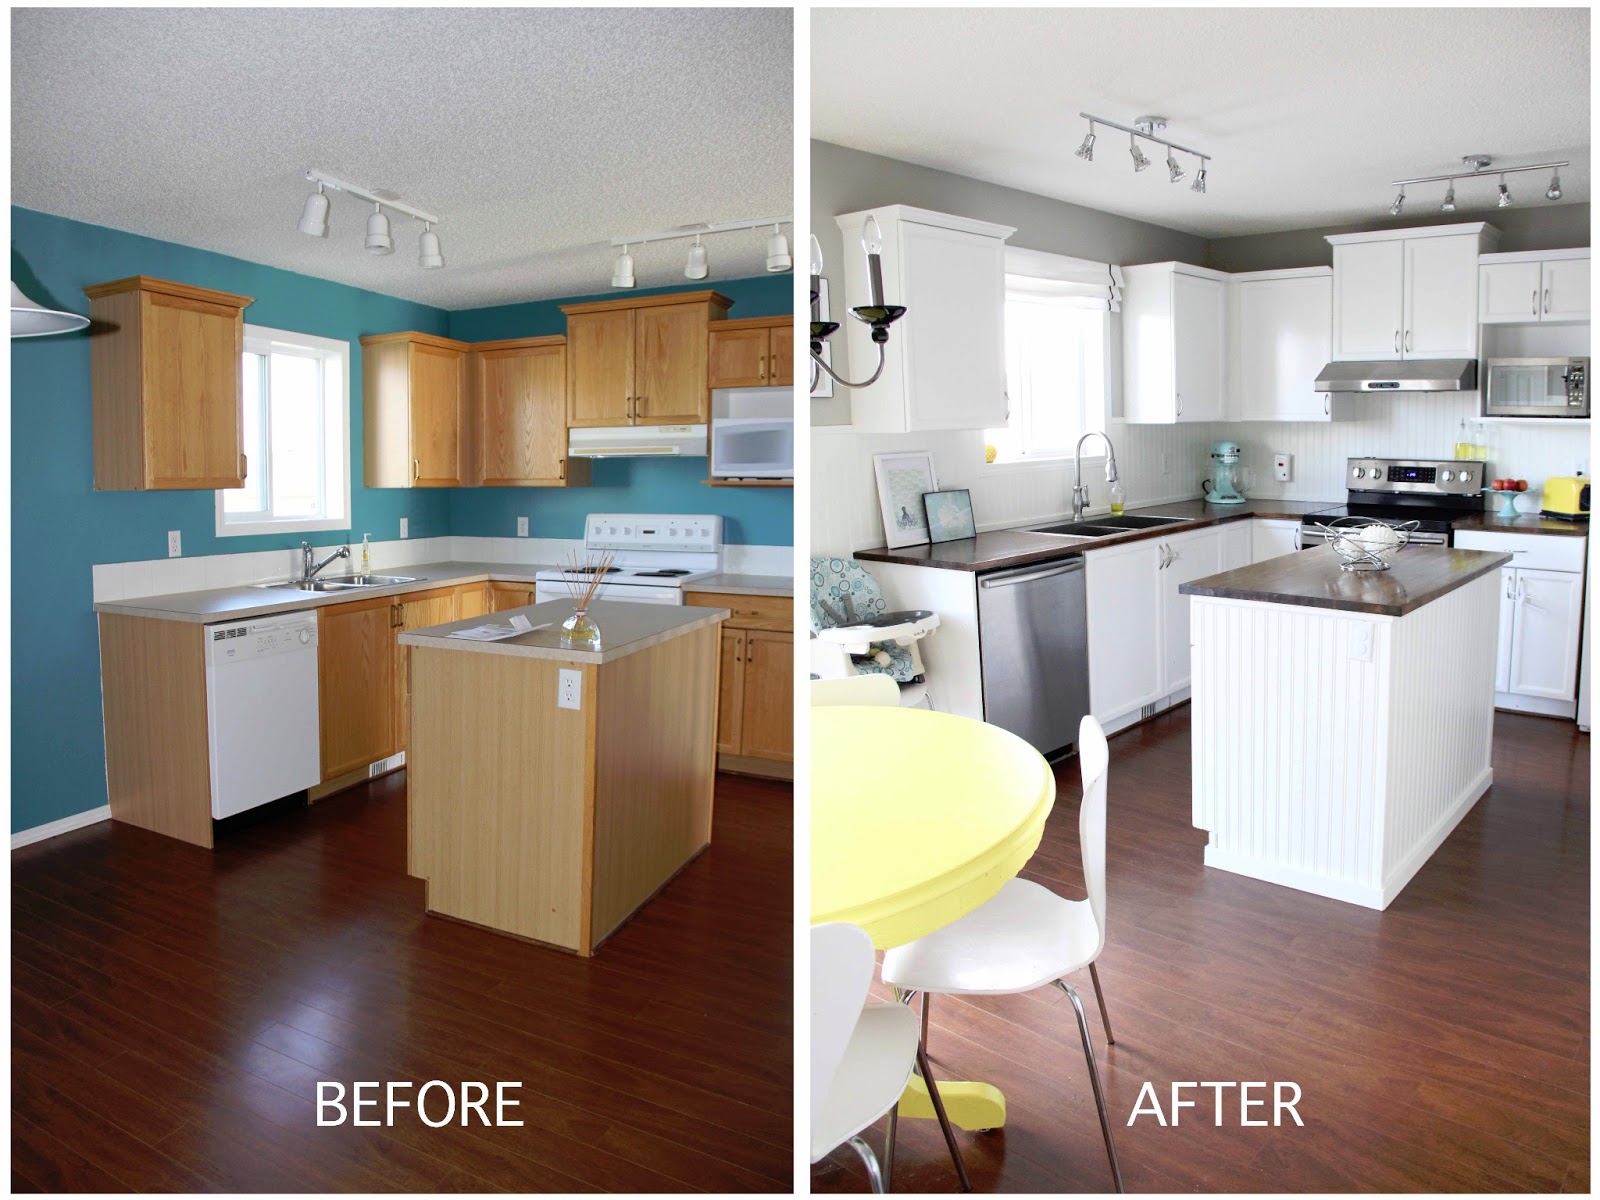
The before and afters in this kitchen make me so happy. The cabinets were painted white and the main wall color painted, removing the teal! Instead, pops of yellow and teal are used in the yellow toaster, the fun yellow dining table, and the kitchen aid mixer. I love the beadboard island and the beadboard is also used on the backsplash.
How To Renovate Your Kitchen By Yourself and On A Budget
- I used my air miles and got about $400 in Rona dollars. I shopped clearance, made all my artwork and did all the renovation work myself
- I found and purchased everything I could on kijiji…Seriously, I bought the yellow table for $25 with 4 chairs. I was able to sell the chairs for the same price so the table was free. I used some spare primer and paint I had in the basement. The new chairs from kijij were $10 a chair!
- I made the faux roman shade from some leftover fabric I had from a previous project. I would love to get some pretty fabric that is colourful but that will have to wait until I find the perfect one.
- I bought both the dishwasher and stove on clearance for killer prices. I mean seriously low…I still haven’t found a fridge for a good enough clearance yet so it will have to wait.
- I painted the toaster yellow so it could be a nice bright accent in my kitchen and it worked like a charm. I made most of the artwork in the kitchen. We got the sweet VW sign for free. We bought the Dr. Pepper sign on Vancouver Island a couple of summers ago so it was just hanging out in the basement.
- I got the wood counter tops at ikea. They were on clearance as they are no longer carrying this exact type. I finished them in minwax stain and 5 coats of waterlox topcoat.
- I used my Rona money for the breadboard, trim, track lights and some other projects around the house.
- I bought 3 gallons of paint and used it all from Sherwin Williams at their 40% off sale. This is the best way to buy paint because it is cheaper than buying at the big box stores.
Sources:
Chandalier: Lowes Clearnace $25
Wood Countertops: Ikea clearance $120
Kitchen Sink: Costco
Faucet: $99 from PlumbingOverstock
Roman Shade: DIY from scrap fabric
Table: $25 for table (which ended up being free) and $40 for chairs
Dining Chairs: $10 each on Kijiji
Hoodfan: Kijiji $40

* If you are looking to remodel a kitchen, here are some tips to get exactly what you want out of a kitchen design.
I offer e-design services where I can create an inspiration picture or full design plan for your space. See an example of an e-design here.

Comments & Reviews
originalgreetings says
This is beautiful, really great work.
Jamie -Better With Age says
I love this! I love how you got all your finds 😉 I’m your newest follower!
Jamie ~ Better With Age
Emily says
Beautiful! I love everything about this kitchen! The gray paint, white cabinets and beadboard and your pops of yellow. Absolutely gorgeous! You did a great job. 🙂
Visiting from Tuesday Time Out.
~Emily
http://www.texaslifeblog.com
Clover + Mustard says
This is GREAT! I can’t tell you how much I love LOVE kitchen redesigns. Especially when it has to go with painting things white & grey. Something about it is just so inviting.
Amazing work!!
[Found you via homework]
xo,
Michelle
cloverandmustard.blogspot.com
craftygirlaz says
I really love everything you did. I love the yellow VW sign my husband is obsessed with his VW. Did you make it or buy it?
found you via thewinthrop chronicals
Desiree
craftygirlaz.blogspot.com
Alauna says
My husband got this off a 70’s bus when he bought a engine for his project car. We got it for free and I just love how it feels in the space!
Paula Schuck says
Gorgeous! I love it. I liked the before but I love the after. Now, if only you lived closer to me you could do mine. It is hideous. Truly. I don’t exaggerate at all. Hideous slate blue that is same colour as when we moved in 11 years ago.
Sarah says
I adore this kitchen! I’m becoming more and more comfortable with home DIY projects…and I look forward to the day I can tackle something like this. Just lovely!
Jenna says
Wow! This is incredible! Love it!
Lauren says
Great job on your kitchen. I love it. I am hosting a link party and would love it if you would link up. http://www.ifitsnotbaroquedesignblog.blogspot.com
Bonnie and Trish @ Uncommon says
Incredible! I am always in awe of a girl who can envision a beautiful design and actually do it herself. COngrats! https://docs.google.com/spreadsheet/ccc?key=0AqOYZY6JHVmPdGp2ZTl6M09pZ25DT2Jwai1tWk1DTHc&usp=sharing
Little Vintage Cottage says
It really looks pretty, I love all the pops of yellow and aqua you’ve added!
Tania
Katie @ Creatively Living says
Impressive! I’ll be featuring this in an upcoming post! Great job!
thecushioncorrespondent says
Stunning. I love the neon citrus colour of the dining table – looks perfect with the grey on the walls. This is so fresh and bright, great job! x
Judy diyAddict says
Amazing transformation. Terrific Job.
Judy
http://www.pursuitoffunctionalhome.com
http://www.kusinaniinday.blogspot.com
Laurie @ Laurie's Little Bits of Creativity, etc. says
Beautiful transformation! Loving the pops of yellow and the Dr. Pepper sign! I’m in the midst of a kitchen reno. Haven’t posted the whole reveal yet, just sneak peeks. I’m visiting from Confessions of an ADD Housewife linky party and am now following you.
Alauna says
Thanks for featuring my kitchen on your blog!
Alauna
http://chickensofthesouth.blogspot.ca
Ellora Drinnen says
Just checked it out over on your blog! I love it!! So glad I found your blog, too!
Brooklyn Berry says
I know, she is good right? I wish her energy rubbed off on my.
Carolyn says
Just to let you know, I featured your wonderful project on homework today. Thanks so much for sharing it at my link party. http://carolynshomework.blogspot.com/2013/02/the-inspiration-board-link-party_15.html
srpprcrftr says
Your kitchen is incredible, that gray paint color is gorgeous, so clean looking and light. What color Sherwin Williams paint is that? The price of paint now is so outrageous it’s hard to afford to paint a room. The hints of yellow here and there are the right little accents. Great job.
Love the yellow toaster. We don’t have an IKEA in Grand Junction, CO so I’d have to go to Denver to buy the wood counter tops. I’ll have to find out if they ship them, would be pretty pricey tho I imagine. Will be busy doing some research for counter top we can afford. Ours are really crummy.
Please let me know what color paint you bought @[email protected] thanks alot. Really enjoy your blog.
Found you thru Inspiration Gallery
Alauna says
I used Sherwin Williams Mindful Gray.
Alauna
http://www.chickensofthesouth.blogspot.com
Danielle @ 2 Little Superheroes says
Wow this is so amazing. I can’t even believe it’s the same room. It has a totally different feel now. And I love that you did it on such a budget and by yourself.
Emily Morgenstern says
Lovely!! What a transformation!
Pinned! Thanks for the inspiration 🙂
Carissa Rasmussen says
i would so love to know more about your shelf above the computer desk! i looove it and i have a similar set up and don’t know exactly what to do. fabulous job, i love the beadboard!
Connie says
Incredibly amazing work! (Visiting from Houzz) Two thumbs up!
Kim@NewlyWoodwards says
This is just such a wonderful transformation. I love how the paint totally transforms the space, and the darker stained countertops are fabulous. I love our butcher block, but I wish I would have trusted my gut and stained it. Also – the yellow toaster. BRILLIANT>
Tara says
You are seriously skilled in the art of saving money. I am thoroughly impressed. Love how it turned out.
Vestal says
Not buying the $500 state cost. Of the few items listed with cost it comes to $360. There is no way to get serviceable appliances for $140.
Alison Watson says
I really love the cabinets! I’m so inspired, can you please share the type of paint you used that will actually stick and prep involved? Thank you! Great job.
MaryHS says
FYI http://www.apartmenttherapy.com/before-amp-after-an-impressive-500-kitchen-makeover-213210
Brooke says
Thanks for sharing Mary! That is so exciting!
Brooke says
and I just saw your comment on the Apartment Therapy post. Thanks for your help!
Ruby says
Love the roman blind. Can I get the instruction for the blind making
Brooke says
There is a really great tutorial on making roman shades from mini blinds. I have used it lots on the past. She even has an updated post on tricks she did differently the next time. Check out Jenny’s post at http://littlegreennotebook.blogspot.ca/2013/02/diy-roman-shades-from-mini-blinds.html
Kitchen & Bath Design says
Great post, I’ve been looking for some inspiration for my own kitchen. thanks for sharing.
Arlene Chaves says
Everything looks perfect especially your cabinets. I love how it’s painted, so relaxing.