• Skip to primary navigation
  • Skip to main content
  • Skip to primary sidebar

Brooklyn Berry Designs

DIY and Design for Creative Moms

  • Family Fun
    • Games & Fun
    • Kids Crafts
    • Lifestyle
    • Book Shelf
  • Crafts
    • Laser Crafts
    • Cricut
      • Cricut Projects
      • Cricut Tutorials
    • Sublimation
  • Holidays
    • New Years
    • Valentines Day
    • St. Patricks Day
    • Easter
    • Mothers Day
    • Fathers Day
    • Summer
    • Patriotic
    • Canada Day
    • Back To School
    • Halloween
    • Thanksgiving / Fall
    • Christmas
  • Digital Downloads
    • SVG Files
    • Printables
  • Shop
  • Brooklyn Berry Designs
  • About
  • Press/PR
  • Blog
  • Shop

Halloween

Home » Holidays » Halloween » Easy Spider Treats for Halloween | Quick Simple Recipe

Easy Spider Treats for Halloween | Quick Simple Recipe

Created On: October 16, 2025  |  Updated: October 16, 2025  |   Leave a comment

This post may contain Amazon and other affiliate links. Using these links, I earn a small commission at no additional cost to you.

FacebookPinterestX
Pinterest Hidden Image

Make spooky-cute spider donuts with mini chocolate donuts, pretzels & candy eyes! This 3-ingredient Halloween treat is quick, fun, & perfect for a party treat.

Create spooky spider treats for Halloween in minutes! A fun, budget-friendly recipe busy moms will love. Simple ingredients, no stress, all smiles!

Halloween is all about fun, not fuss — and these adorable spider treats prove it! Whether you’re planning a classroom party or a spooky movie night at home, this simple recipe brings smiles without the stress. With just a few everyday ingredients and less than 15 minutes, you’ll have a batch of creepy-cute spider snacks your kids will love to help make (and eat!).

Don’t worry if you’re not a crafty baker — this recipe is practically foolproof. In just a few simple steps, you’ll create festive spider treats that look amazing and taste even better. Here’s everything you’ll need to get started:

Ingredients You’ll Need For Halloween Spider Treats:

  • Oreo cookies
  • Chocolate covered pretzels
  • chocolate melting wafers
  • candy eyes

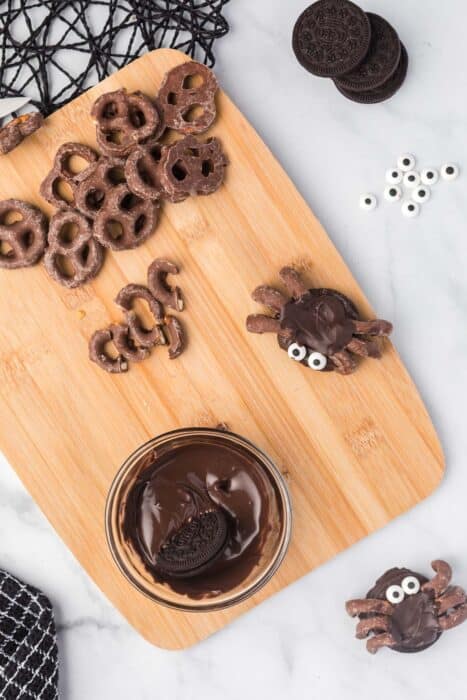
How To Assemble the Spider Oreos:

The joy of this recipe is that is so simple. By using melting chocolate wafers, you can use the microwave to melt the chocolate. Just be sure you are stirring every 30 seconds until it’s smooth.

For young helpers I like to give them their own individual bowls to dip into. It helps speed things along for those who don’t want to wait.

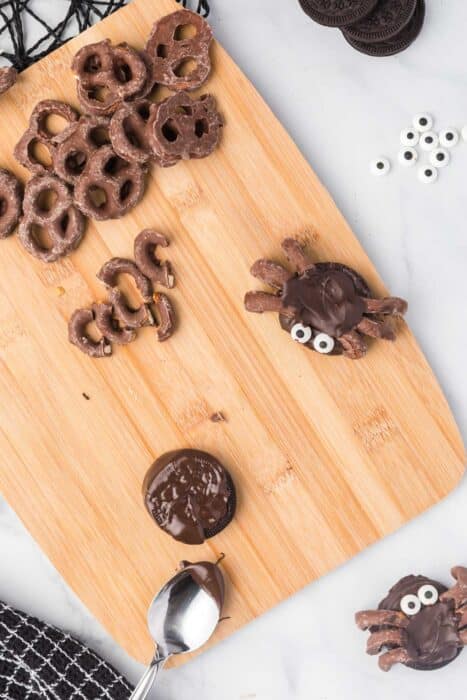
Each chef can choose to dunk the entire oreo into the chocolate (a yummy but messier option) or spoon it onto the top.

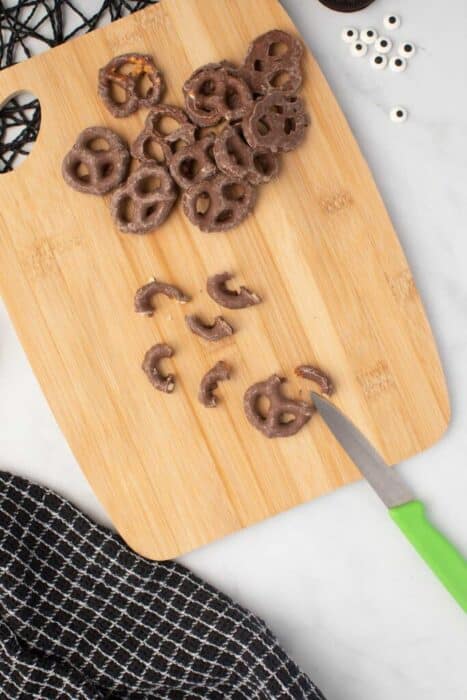
We used chocolate-covered pretzels to get the bumpy look of spider legs. Precut or supervise the chopping! Other options for legs could be pretzel sticks or poky sticks.

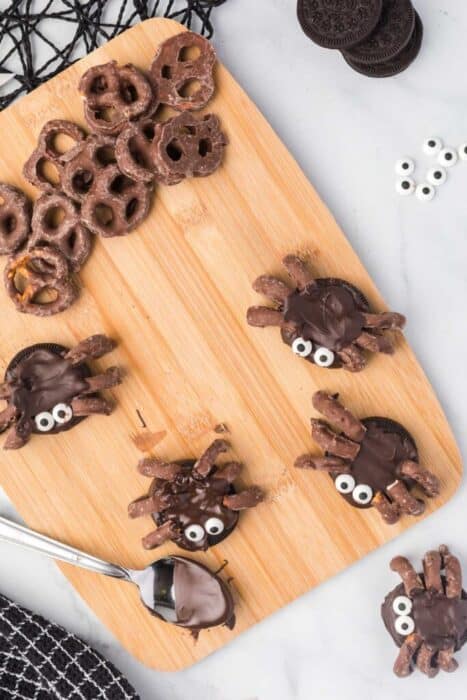
Add two candy eyes – or three or four! to finish your cute spider treats. If you chocolate has already set you can add a small dab on top to make sure the legs stick!

These chocolate covered oreo Halloween Spider Treats are such a fun and easy snack! Simple ingredients and the kids will love it!

signature Brooke from Brooklyn Berry Designs

The Chocolate Covered Oreo Spider Treats Recipe:

spider treats for Halloween
Print

Spooky Spider Treats For Halloween

Create spooky spider treats for Halloween in minutes! A fun, budget-friendly recipe busy moms will love. Simple ingredients, no stress, all smiles!

Materials

  • Oreo cookies
  • Chocolate covered pretzels chopped
  • Chocolate melting wafers
  • Candy Eyes

Instructions

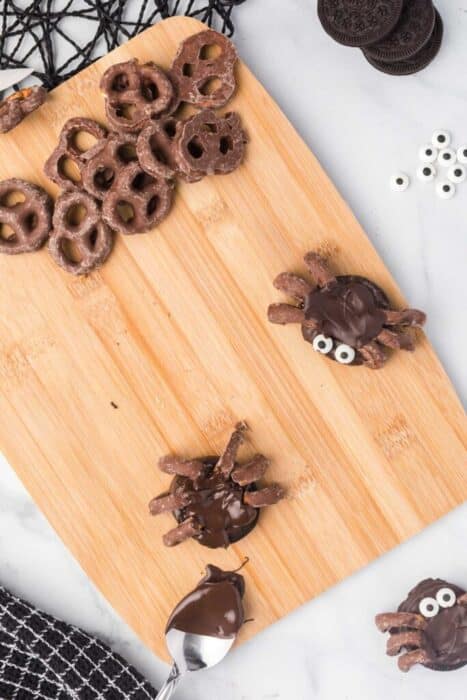
  • Melt chocolate wafers and stir until smooth. Coat the top of one oreo with melted chocolate.
  • Gather the chopped (halved) chocolate pretzels and place into the melted chocolate. Spiders can have two or three legs on each side, whichever fits best! Dab some chocolate on top for extra strength if needed.
  • Place edible candy eyes in any pattern you like – just hurry before the chocolate sets!
spider treats for Halloween
FacebookPinterestX

posted in: Family Fun, Halloween, Holidays, Kids Crafts, Life

Previous
PUMPKIN CARVING STENCILS

Reader Interactions

Leave A Reply! Cancel reply

Share your thoughts!
Your email address will not be published. Required fields are marked with *

RATE THIS!


This site uses Akismet to reduce spam. Learn how your comment data is processed.

Primary Sidebar

Brooke - Author of Brooklyn Berry Designs.

Brooke is an interior designer and DIY’er who loves all things creative and crafting. She loves to be busy with at least 3 projects on the go and is constantly chatting or singing along to the radio. As a mom to 4 boys, she is always blending creativity and chaos, with some diet coke mixed in. Stick around for the big projects and get 20 little projects in between.

More About Me

Step By Step Guide To Your Cricut!

Level Up Your Cricut Game - Become a pro in 5 days with this free Cricut email course.

Thank you for subscribing!

Let's Get Creative

Subscribe to get free SVG files, Cricut and laser cutter tutorials, fun printables, and easy crafts right to your inbox! Its free!

Thank you for subscribing!

Featured Projects

  • Customize With Cricut Design Space Tools
  • Best Cricut Access Fonts
  • make your own canada 150 waterbottle
    How to upload your own images with Cricut
  • How To Upload A SVG File To Cricut Design Space

Let's Get Creative

Subscribe to get free SVG files, Cricut and laser cutter tutorials, fun printables, and easy crafts right to your inbox! Its free!

Brooklyn Berry Designs Logo

About

  • Brooklyn Berry Designs
  • About
  • Press/PR
  • Blog
  • Shop

Topics

  • Crafts
  • Cricut Projects
  • SVG Files
  • Printables
  • Cricut Tutorials

Holidays

  • New Years
  • Valentines Day
  • St. Patricks Day
  • Easter
  • Mothers Day
  • Fathers Day
  • Canada Day
  • Back To School
  • Thanksgiving / Fall
  • Halloween
  • Christmas
©2025, Brooklyn Berry Designs. About Press/PR Back To Top
Design by Pixel Me Designs
×

Let's Get Creative

Subscribe to get free SVG files, Cricut and laser cutter tutorials, fun printables, and easy crafts right to your inbox! Its free!

Thank you for subscribing!