Make Your Own Car Play Mat With the Cricut Maker
Lots of young boys love to play with toy cars, and a play mat to drive toy cars on will keep them entertained for hours! If you dream of making your own, but dread the hours of sewing and cutting fabric than todays tutorial will be exactly what you need. I will show you how to make your own car mat in a couple of hours and don’t even have to use a sewing machine!

This is a sponsored conversation written by me on behalf of Cricut. The opinions and text are all mine.
When I first learned about the Cricut Maker and saw how precisely it can cut fabric details, I had so many projects in mind. It wasn’t until I saw the fusible fabrics that I knew what old project I wanted to remake.
I made a very large toy car play mat many years ago. Since then we have added 3 more boys added to the family who have played with that mat (they call it a map) until the fabrics have frayed. At the time I didn’t know about fabric stabalizer, or anything to press to the fabric to make it adhesive. I have some that I have tried, but I honestly get stressed about which side is which, and how it all worked. So I wanted to remake it eventually, but it wasn’t until I had access to both the fusible fabric (so easy, the work is already done for you) and the Cricut Maker to cut out all the pieces for me.
If you want to make your own car play mat (and you do, because it is so cute and so easy) I will share all the details, tips and tricks as well as the files I used to cut it all out.
Design Space Files
Most of the files came from the cartridge My Community. I did end up going into the files and using the slice tool (using the knock out method) to separate the layers. I used fusible fabric for most of the base layers and iron on vinyl for the accents like windows, doors, etc. Because it is not recommended (or possible, in some cases) to layer on top of patterned or metallic vinyl, the images had to be cut out. It is also tricky to layer more than 3 layers of vinyl. So with that in mind, here are the files for the car play mat.
Roads and trees
Houses
Barn
Fire Station
Post office
Candy Store
Materials and Supplies
Cricut Maker
Rotary Blade
Fusible Fabric
Iron On Vinyl

After loading the design space file, send it to the machine to cut. Make sure you have the rotary blade loaded for all fabric layers. I cut all my fusible fabric with the adhesive side down and fabric face up, which is different than the usual mantral of pretty side down. Be sure to NOT mirror image it, but to then still mirror image the other layers so everything lines up right. I may have made that mistake a couple times and had to re-cut a couple layers.

Decide on the design and layout of your final project. I planned out the general layout on my fabric sheet and worried more about the colors of each building that would be together. Each base is cut from fusible fabric. Accents were cut out if iron on vinyl. Accents (the top layers) were cut from metallic and patterned iron on, or regular iron on.

Follow the heat settings guide to adhere your materials to the fabric. Be sure to leave the protective clear plastic even after they have been ironed on. When you go back to other layers you will want to be careful not to melt your previous layers of vinyl. Ask me how I know. You can also have a sheet of fabric or a teflon sheet handy to protect all that hard work.
Looking for more project ideas? Get inspired with these Cricut Projects!
Iron On Vinyl Tricks

After it has all cooled, press it again with the heat from the under side. Let it cool, remove all the plastic, and let them play!
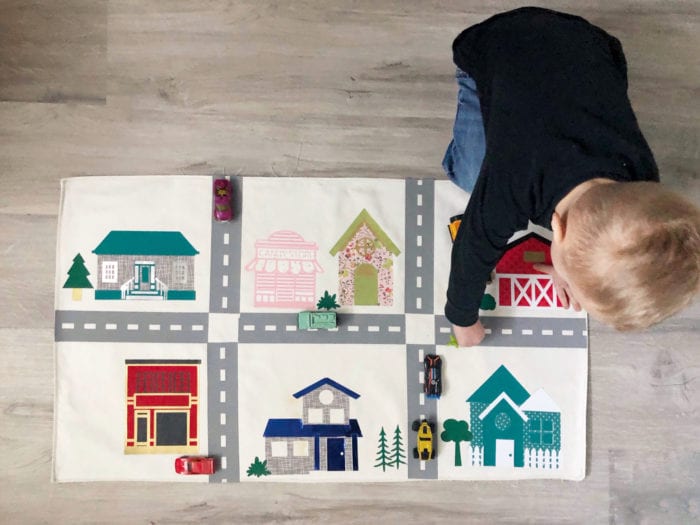
My son seriously couldn’t wait to get ALL his little cars onto his brand new car mat. He then told me I was his best friend because I play with him. So total win in my books.
I will probably go back and sew around the seams where the fabric isn’t covered with vinyl, just to make sure it lasts forever. But this could easily be a no sew project and would still last for years and years.
Happy crafting my crafty friends!


Leave A Reply!