
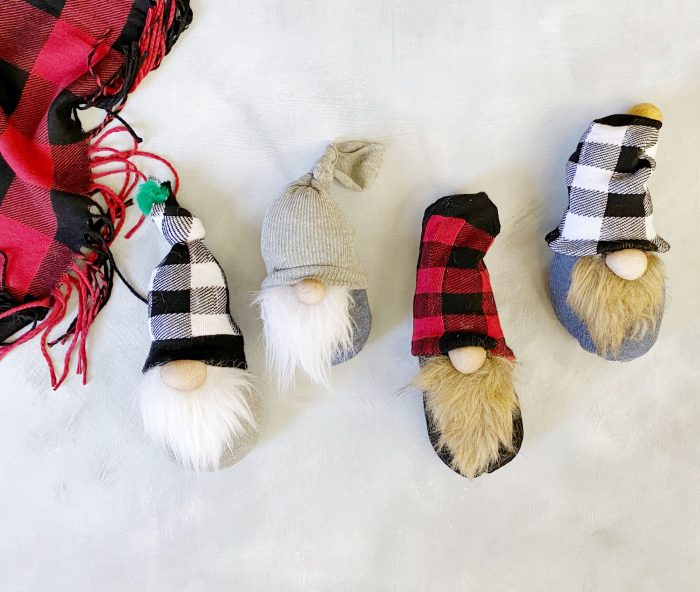
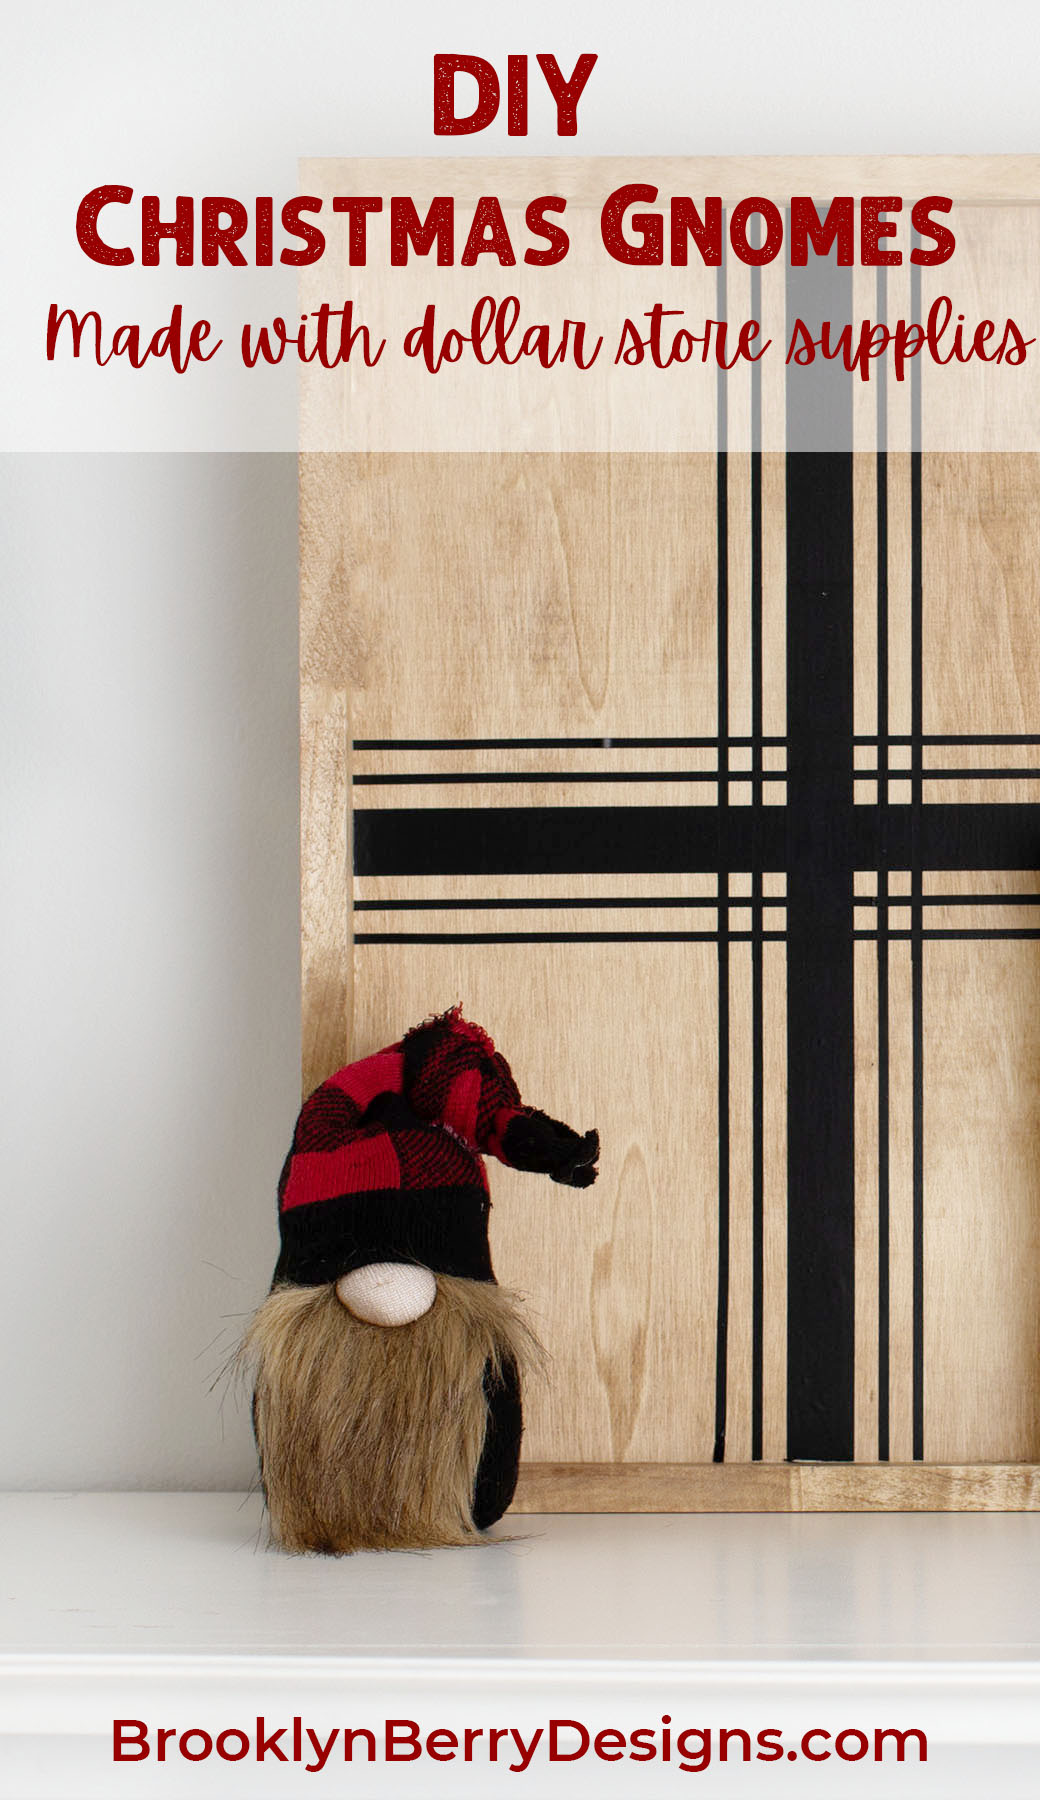
This DIY Christmas gnome is easy to make and add a little cuteness to the smallest corners of your home. Made with supplies that are easily found around your home or picked up at the dollar store, kids will love making their own dollar tree sock gnomes.
We have been spending a lot more time at home these days with most after school activities cancelled. On a recent PD day with my boys home from school I needed a way to keep them busy without playing on screens for hours. I had a project in mind for some sock gnomes and decided to let my boys “help” me make them.

My boys didn’t seem to care about this craft until I broke out the supplies and suddenly all my kids were in the room wanting to pour the rice into the socks.

How To DIY Christmas Gnomes
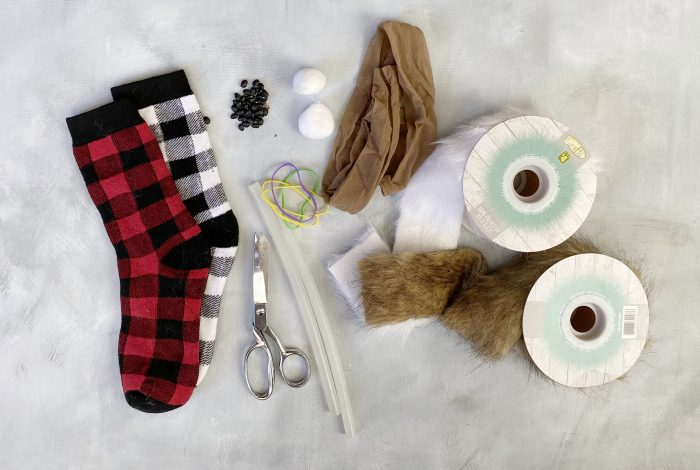
Supplies Needed:
- socks
- rice or beans
- stuffing / fluff / polyfill
- faux fur
- elastic bands
- scissors
- hot glue stick
- glue gun
- cotton ball
- nylons
Steps To Make Your Own Christmas Gnome
- Pour a cup of rice into the sock and fill the rest with polyfill. The amounts will vary depending on how tall you want your gnome to be. There just needs to be enough rice to keep the gnome standing.
- Tie with a rubber band and trim the sock with scissors.
- Cut the faux fur into a triangular shape. Again I eyeballed the size. Some people will use a razor blade to not cut the fur on the front side, I just brushed the fir against the grain and toward the center.
- Make a nose by wrapping a cotton ball in a piece of nylon and gather the ends together. Tie with an elastic band or use glue.
- Before attaching everything adjust the pieces and check the fit. Glue the beard and nose onto the sock body with the hot glue gun.
- Use the end of a sock to form a slouchy gnome hat. I like to use the finished edge to go across the gnomes face but you could also fold a cut end of a sock underneath.
Tips and Options:
As with everything there are lots of options you can use to customize and make your Christmas Gnome your own. If there are supplies you can’t find you can always use something else. That is what is fun about these gnomes – they all have their own personalities and you can wing it!
DIY Gnome body
You can use any sock type, and this is a great time to use those socks that are missing their mates from around your house. The thicker the sock the more sturdy the gnome. If your socks are thinner and the rice could slip through them, add another layer of a sock.
For stuffing you can take apart an old pillow or an unused stuffed animal (just DON’T let your kids see because all of a sudden it becomes their favorite toy ever).
DIY Gnome Beard
Faux Fur for the beards can be found at the dollar store in the ribbon section. I found both a white fur and brown fur on a roll. If you are making a larger gnome that requires a beard wider than 2 inches you will need to look at a fabric store – which means you can find the really pretty colors and styles.
I have also seen some gnome beards made with cotton rope brushed out
(the kind used for macrame) and have seen others use mop heads from the dollar store.
aux fur: This can get expensive. If you are only planning on making a few gnomes, 1/2 yard should work just fine. I loved the faux fur with a couple of different color tones, but get what you love! Before ordering online, check to see if your local WalMart, Hobby Lobby, or JoAnns has any in stock.
DIY Gnome Hat
I am thinking of making another gnome with felt for the hat for a more structured and rigid hat. You could also use fleece or any other fabric. For the fabric options you could use wire to keep the hat standing up. Add stuffing if you want. It all depends on how you want it to look.
DIY Gnome Nose
You could also use a felt ball, wood bead, or wood ball. The wooden beads are really cute but I had a hard time finding them at an affordable price. If you are set on the wooden bead noses try Michaels or Hobby Lobby and use a coupon!
Save this dollar store craft for later:
Love Gnomes? Check out my free “Chillin With My Gnomies” SVG
DIY CHRISTMAS GNOMES
Equipment
- Scissors
- Glue Gun
Materials
- Socks
- Rice
- Polyfill
- Faux Fur
- Elastic Bands
- Hot Glue Stick
- Scissors
- Cotton Ball
- Nylons
Instructions
- Pour a cup of rice into the sock and fill the rest with polyfill and tie the sock with a rubber band.
- Cut the faux fur into a triangular shape. Again I eyeballed the size. Some people will use a razor blade to not cut the fur on the front side, I just brushed the fir against the grain and toward the center.
- Make a nose by wrapping a cotton ball in a piece of nylon and gather the ends together. Tie with an elastic band or use glue.
- Make a slouchy hat with a sock. Keep the finished edge for across the gnomes face but you could also fold under the cut end of a sock underneath.

Leave A Reply!