• Skip to primary navigation
  • Skip to main content
  • Skip to primary sidebar

Brooklyn Berry Designs

DIY and Design for Creative Moms

  • Family Fun
    • Games & Fun
    • Kids Crafts
    • Lifestyle
    • Book Shelf
  • Crafts
    • Laser Crafts
    • Cricut
      • Cricut Projects
      • Cricut Tutorials
    • Sublimation
  • Holidays
    • New Years
    • Valentines Day
    • St. Patricks Day
    • Easter
    • Mothers Day
    • Fathers Day
    • Summer
    • Patriotic
    • Canada Day
    • Back To School
    • Halloween
    • Thanksgiving / Fall
    • Christmas
  • Digital Downloads
    • SVG Files
    • Printables
  • Shop
  • Brooklyn Berry Designs
  • About
  • Press/PR
  • Blog
  • Shop

Design & Home Decor

Home » Design & Home Decor » DIY Shiplap Island Trim – Before and After

DIY Shiplap Island Trim – Before and After

Created On: August 26, 2016  |  Updated: April 10, 2019  |   6 Comments

Pin
Share
Post
788Shares

This post may contain Amazon and other affiliate links. Using these links, I earn a small commission at no additional cost to you.

Adding Trim To An Island

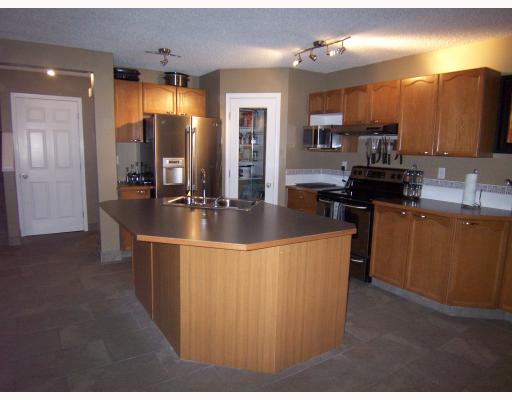
When we first moved into this house I immediately wanted to tackle the kitchen.  I had dreams of painting the cabinets, adding bead board trim to the island, and painting it (see my sketches and kitchen ideas).  As most real projects tend to go, this kitchen facelift has been a really long time coming.

My Kitchen Before

Changing Cabinets To White

Rather than painting the existing cabinet doors white they were replaced with brand new doors on the same frame.  This one decision was the best decision we have made, saving us thousands of dollars.  The door profile is so much more modern than the original arched panels.IMG_9624

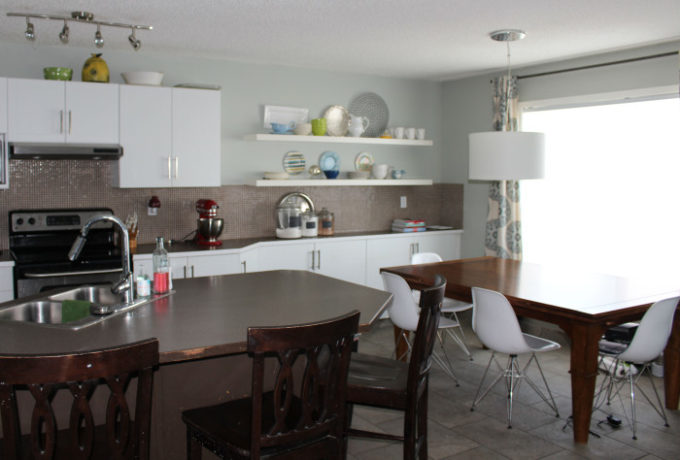
The island got new cabinet doors and was painted a dark brown.  It was just how I thought I wanted it to look, but I hated it. It was so dark and it looked really basic.  I lived with it for a while and debated what to do.  First it was beadboard.  Then board and batten to match the entry.  But then I decided to add planks, also known as shiplap trim.  I read a couple of tutorials (mainly this one from House of Smiths) and got to work.

How To Add Shiplap Trim To An Island

IMG_1510
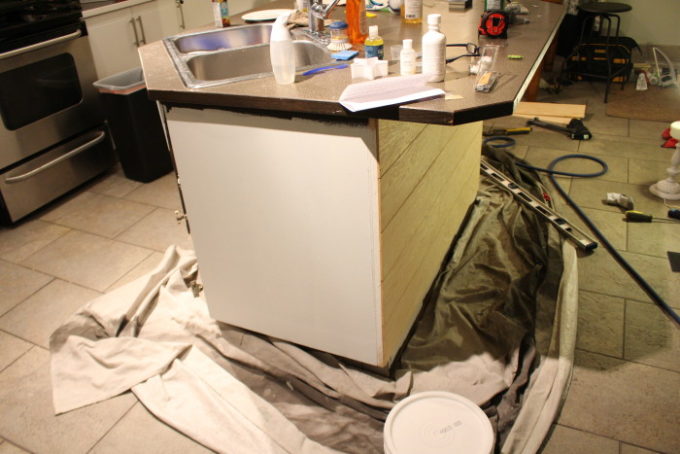
The first step was painting over the dark paint so it didn’t show through the spaces in the planks.

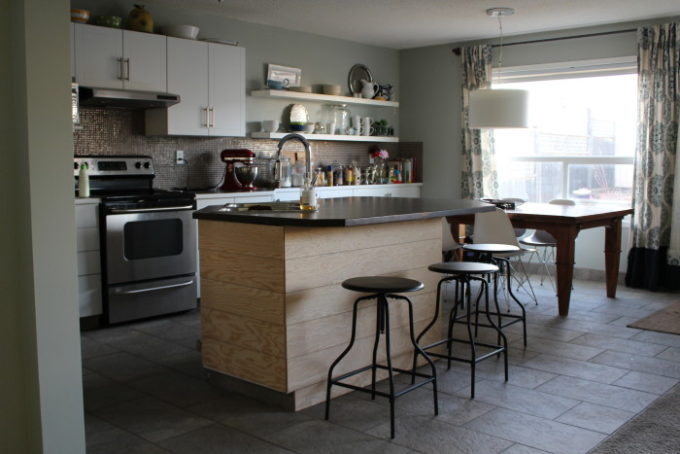
Paint ready plywood.  It comes in 4×8 sheets and we had them cut down to 6″ wide planks at the lumber store.  Because it isn’t perfectly level, we started at the top with a level plank and worked our way down, leaving the bottom plank to be trimmed to fit.

Corners – on the 90 degree corners we added corner trim to hide the rough edges of the wood.  The tricky part on our island is the odd angle nearest the dining table.  We had to miter the corners there to line up perfectly smooth.

IMG_1516

This corner with the baseboards drove me crazy.  The tile is on the bottom of the cabinet, but it doesn’t wrap the entire way around.  I wanted to add a tall baseboard around the base, but I couldn’t think of what to do with this corner. Even worse, it’s the first angle of the island that you see when you enter the room. shiplap island w

Paint

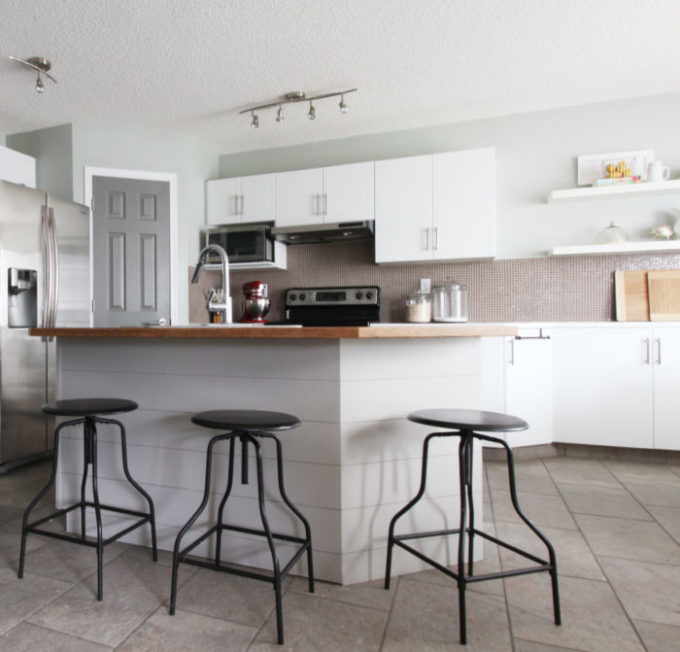
The shiplap trim is painted Old Sterling Tint 1 from Para Paints.  It is the perfect soft grey – not too dark, and not too cold.  We used the cabinet and furniture line, it is called ULTRA Cabinet & Furniture paint but on the west coast it is labelled as Optima.  You can get it at a Para Paint store, or at Lowes. And let me tell you, the paint is wonderful.  Without adding a top coat or any other finishes, the paint itself has held up really well.  With kids kicking it, chairs being knocked over, and the vacuum hitting it, this island gets a lot of action. I am so thrilled with how it turned out.

What do you think?
IMG_6245

Pin for later:

Shiplap Island Trim

Pin
Share
Post
788Shares

posted in: Design & Home Decor

Previous
The Ultimate Game Room – Dallas Cowboys Style
Next
What To Look For In Glass Shower Doors

Reader Interactions

    Leave A Reply! Cancel reply

    Share your thoughts!
    Your email address will not be published. Required fields are marked with *

    RATE THIS!


    This site uses Akismet to reduce spam. Learn how your comment data is processed.

    Comments & Reviews

  1. Kim says

    August 30, 2016

    11looks awesome!! what a great idea i need to fix my kitchen!

    Reply
  2. Lauren says

    February 17, 2017

    What did you do to the front of the island? Did you paint the cabinets?
    This looks fantastic by the way!

    Reply
    • Brooke says

      February 21, 2017

      Because of the angled edges on the island, the other side just has a dishwasher and two cabinet doors that are painted the same color. I will have to get a picture of it to show you.

      Reply
  3. Aniko says

    July 5, 2018

    Hi Brooke, love your remodel. Where did you purchase your new cabinet door fronts? We are looking to replace our cabinet doors and would love more information. Thank you.

    Reply

Primary Sidebar

Brooke - Author of Brooklyn Berry Designs.

Brooke is an interior designer and DIY’er who loves all things creative and crafting. She loves to be busy with at least 3 projects on the go and is constantly chatting or singing along to the radio. As a mom to 4 boys, she is always blending creativity and chaos, with some diet coke mixed in. Stick around for the big projects and get 20 little projects in between.

More About Me

Step By Step Guide To Your Cricut!

Level Up Your Cricut Game - Become a pro in 5 days with this free Cricut email course.

Thank you for subscribing!

Let's Get Creative

Subscribe to get free SVG files, Cricut and laser cutter tutorials, fun printables, and easy crafts right to your inbox! Its free!

Thank you for subscribing!

Featured Projects

  • Customize With Cricut Design Space Tools
  • Best Cricut Access Fonts
  • make your own canada 150 waterbottle
    How to upload your own images with Cricut
  • How To Upload A SVG File To Cricut Design Space

Let's Get Creative

Subscribe to get free SVG files, Cricut and laser cutter tutorials, fun printables, and easy crafts right to your inbox! Its free!

Brooklyn Berry Designs Logo

About

  • Brooklyn Berry Designs
  • About
  • Press/PR
  • Blog
  • Shop

Topics

  • Crafts
  • Cricut Projects
  • SVG Files
  • Printables
  • Cricut Tutorials

Holidays

  • New Years
  • Valentines Day
  • St. Patricks Day
  • Easter
  • Mothers Day
  • Fathers Day
  • Canada Day
  • Back To School
  • Thanksgiving / Fall
  • Halloween
  • Christmas
©2025, Brooklyn Berry Designs. About Press/PR Back To Top
Design by Pixel Me Designs
×

Let's Get Creative

Subscribe to get free SVG files, Cricut and laser cutter tutorials, fun printables, and easy crafts right to your inbox! Its free!

Thank you for subscribing!