• Skip to primary navigation
  • Skip to main content
  • Skip to primary sidebar

Brooklyn Berry Designs

DIY and Design for Creative Moms

  • Family Fun
    • Games & Fun
    • Kids Crafts
    • Lifestyle
    • Book Shelf
  • Crafts
    • Laser Crafts
    • Cricut
      • Cricut Projects
      • Cricut Tutorials
    • Sublimation
  • Holidays
    • New Years
    • Valentines Day
    • St. Patricks Day
    • Easter
    • Mothers Day
    • Fathers Day
    • Summer
    • Patriotic
    • Canada Day
    • Back To School
    • Halloween
    • Thanksgiving / Fall
    • Christmas
  • Digital Downloads
    • SVG Files
    • Printables
  • Shop
  • Brooklyn Berry Designs
  • About
  • Press/PR
  • Blog
  • Shop

Home Decor

Home » DIY Vintage Poster Frame

DIY Vintage Poster Frame

Created On: June 9, 2017  |  Updated: June 8, 2017  |   Leave a comment

Pin
Share
Post
15Shares

This post may contain Amazon and other affiliate links. Using these links, I earn a small commission at no additional cost to you.

Art For A Play Room

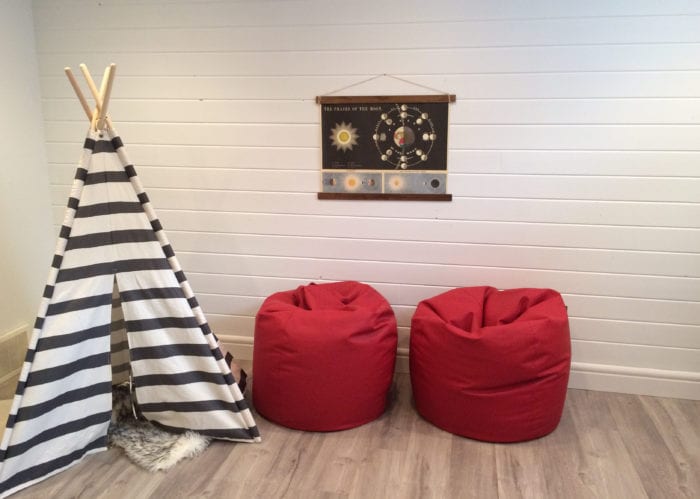
The best art for a kids space is something that isn’t too precious. When we were finishing our basement playroom I looked for posters and decor that is fun, but can hold up to the tornado that is 4 boys running wild on a space. Because it is a temporary art (I have hopes of changing it out whenever I feel the whim) it has to be inexpensive.  

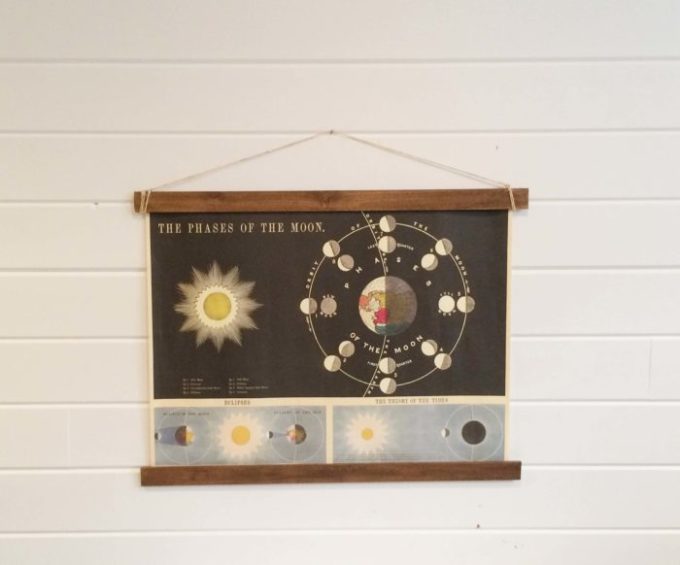
This $6 phases of the moon poster was found while on a weekend away.  I knew I wanted to avoid the traditional black or white picture frame. Instantly I dreamed of the old school maps that would will down from the wall and wanted to make a simple wood frame inspired by those vintage maps.  Here is how I made a simple vintage  poster frame for $5.

DIY Wood Poster Frame, DIY POSTER HANGER, Wooden Poster Frame, Vintage Poster Frame

Here are the materials you will need:

  • Wooden slat
  • stain
  • string
  • tape
  • Saw of your choice

Each of these items can be found at your local hardware or craft store.  The wood slats I used are 3′ long and 1/4″ thick.  You can find them in the trim section with the dowels. Another option is a very inexpensive 1″ x 2″ wood slat (it was a couple dollars).

Make Your Own Vintage Poster Frame

Basement playroom with shiplap walls.

Step 1 – Cut the wood pieces to desired length.  I eyeballed the length to overhang the print a bit and used the compound mitre saw.  You can use a hand saw, the slat is really thin, or have the guys at the lumber store cut it for you when you buy it (have your measurements ready).

Step 2 – Stain the board / dowel.  I used Minwax stain in the color Dark Walnut. Brush the stain on with a paper towel or brush and rub off any excess with a paper towel.  Let the boards dry for a few minutes.

Step 3 – Attach the poster to the frame on both the top and the bottom.  I used clear tape but you could use staples or magnets if you wanted something more sturdy. 

Step 4 – Cut some twine and wrap it around the wood slat and tie into a knot on each end.

Step 5 – Hang your vintage inspired art on your wall.

Pricing – the print was $6 and I made the frame for $3, the only item I had to purchase was the wood pieces.  The stain, rope and tape I already had on hand. My total cost was $9 but if you needed to buy all new suppllies the entire project would likely cost $20 but you would have enough materials to make many many more.  This project is pretty cheap and I love the look of the wood stain with all the painted white wood and light grey wood tones we have in here.

Happy Creating!

Pin
Share
Post
15Shares

posted in: Home Decor

Previous
5 Homes Designed By Frank Lloyd Wright
Next
DIY Canada 150 Water Bottle #Canada150

Reader Interactions

Leave A Reply! Cancel reply

Share your thoughts!
Your email address will not be published. Required fields are marked with *

RATE THIS!


This site uses Akismet to reduce spam. Learn how your comment data is processed.

Primary Sidebar

Brooke - Author of Brooklyn Berry Designs.

Brooke is an interior designer and DIY’er who loves all things creative and crafting. She loves to be busy with at least 3 projects on the go and is constantly chatting or singing along to the radio. As a mom to 4 boys, she is always blending creativity and chaos, with some diet coke mixed in. Stick around for the big projects and get 20 little projects in between.

More About Me

Step By Step Guide To Your Cricut!

Level Up Your Cricut Game - Become a pro in 5 days with this free Cricut email course.

Thank you for subscribing!

Let's Get Creative

Subscribe to get free SVG files, Cricut and laser cutter tutorials, fun printables, and easy crafts right to your inbox! Its free!

Thank you for subscribing!

Featured Projects

  • Customize With Cricut Design Space Tools
  • Best Cricut Access Fonts
  • make your own canada 150 waterbottle
    How to upload your own images with Cricut
  • How To Upload A SVG File To Cricut Design Space

Let's Get Creative

Subscribe to get free SVG files, Cricut and laser cutter tutorials, fun printables, and easy crafts right to your inbox! Its free!

Brooklyn Berry Designs Logo

About

  • Brooklyn Berry Designs
  • About
  • Press/PR
  • Blog
  • Shop

Topics

  • Crafts
  • Cricut Projects
  • SVG Files
  • Printables
  • Cricut Tutorials

Holidays

  • New Years
  • Valentines Day
  • St. Patricks Day
  • Easter
  • Mothers Day
  • Fathers Day
  • Canada Day
  • Back To School
  • Thanksgiving / Fall
  • Halloween
  • Christmas
©2025, Brooklyn Berry Designs. About Press/PR Back To Top
Design by Pixel Me Designs
×

Let's Get Creative

Subscribe to get free SVG files, Cricut and laser cutter tutorials, fun printables, and easy crafts right to your inbox! Its free!

Thank you for subscribing!