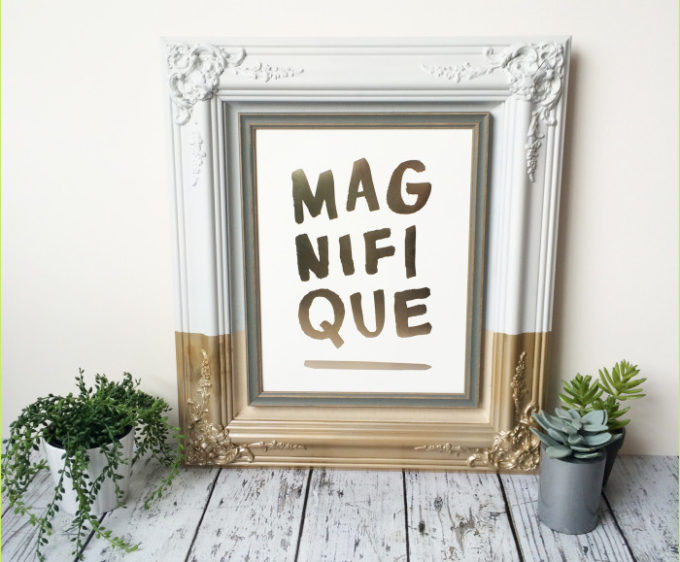
This months challenge for #12MonthsofDIY was to use something wood and share projects using #MarchWoodworking. I was happy to hear that Fusion Mineral Paints wanted to send us all in the challenge some of their paint to use for our projects. Inspired by the artist Oliver Jeffers who paints portraits and dips them, framed, into a bucket of paint, I decided to make my own paint dipped frame.
Years ago I tried to make over a beautiful ornate picture frame that is made of a mahogany wood. I used spray paint and while I loved the general idea, it wasn’t quite right. The color was too yellow, more of a cream than white and the spray paint job wasn’t perfect so it was time for a refresh.
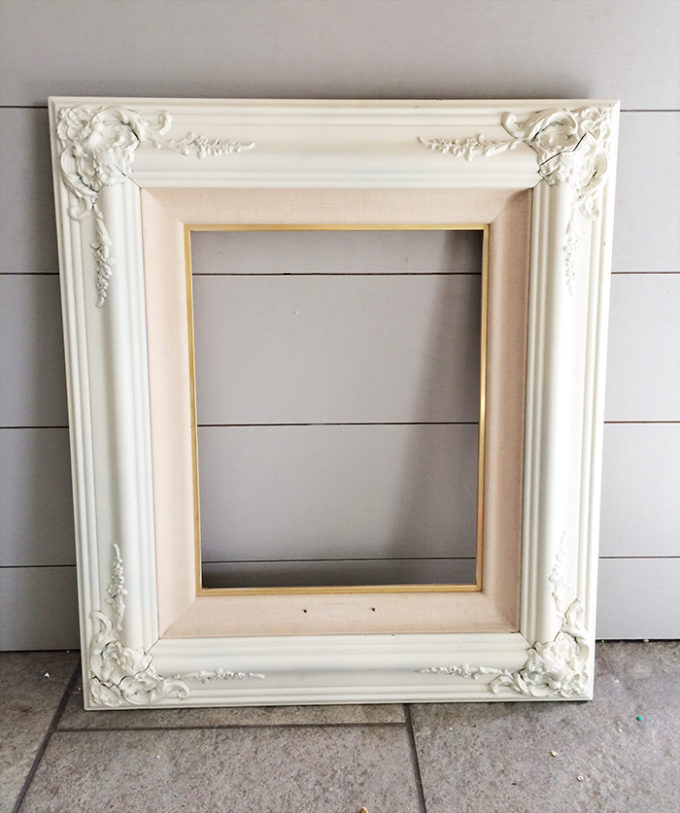
Here is what the picture frame looked like before. Not a total mishap from a distance, but up close not so much. Also, the colors bug me – the mat looks really pink and the frame really yellow. It was time for an update.
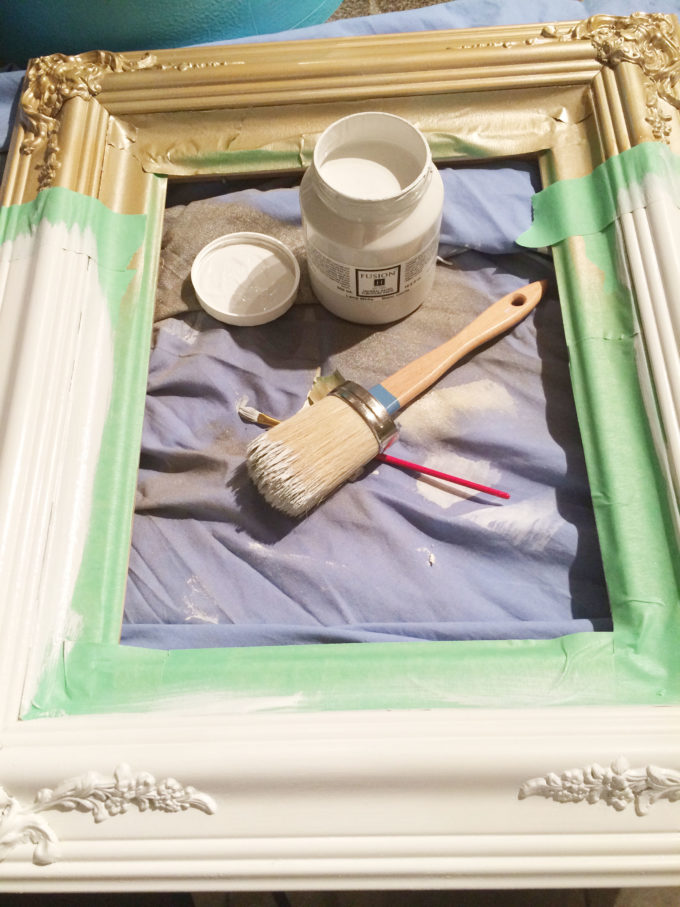
Step One – tape tape tape.
Step Two – Gold Spray Paint. Let it dry fully before moving on.
Step 3 – tape tape tape. For this frame make sure you get the tape into the nooks and crannys.
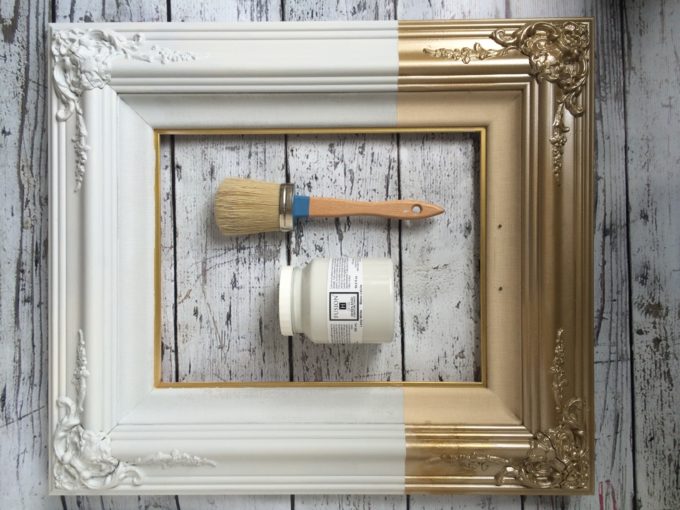
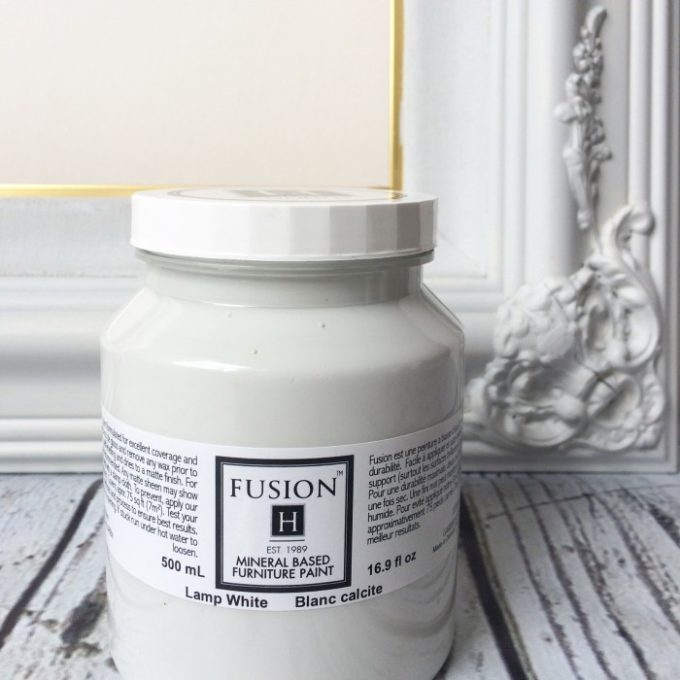
Step 4 Paint again. I chose Fusion’s Lamp White paint and it is a perfect color. I strongly debated whether or what to do with the mat – because the color was a bit off before, but its actually a linen fabric. I liked the way it looked as is with the gold, but hated it with the white just like I did before. I ended up painting the mat white JUST where the frame was painted white.
Here is the paint in the bottle compared to the painted frame just for a color comparison.
The finished frame:
Thoughts on the paint:
Fusion Mineral Paint was a dream to paint with. It went on really smooth and covered very well with two very light coats. It took a bit longer to dry than chalk paints I have used before, which is good if you need to touch up or pry a hair out of the paint. What intrigued me is that mineral paint doesn’t require a top coat. What! As much as I love painting furniture, the top coat is something I haven’t loved yet. Its tricky. So, I am curious to see how this holds up. Right now the finish is perfect as is, it feels sealed and dry (is that the right word? not sticky, firm in place?). Its perfect for a frame and I gave it a good scratch test and it didn’t scrape with my fingernails.
Has anyone used chalk or mineral paint in a sprayer? This combo might be perfect for my coffee table or piano.
For more information on Fusion Mineral Paints check out their website, facebook page, pinterest, or instagram.
Now it’s time to see the rest of the DIY fabric project ideas from my Canadian blogging friends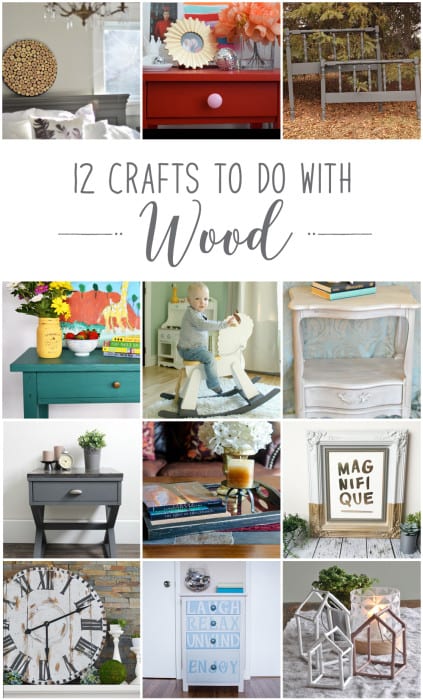
From the top left, they are:
Wood Slice Art from Vin’yet Etc.
Ikea Bedside Table Revamp from PMQ for Two
Painting Wood Furniture from Fresh Crush
Easy Wooden Table Makeover from Woman in Real Life
Wooden Rocking Horse Upcycle from Mommyzoid
Metallic Painted Nightstand from New House New Home
Industrial Side Table from Love Create Celebrate
Wood Coffee Table Tray Gets New Makeover from Time with Thea
Paint Dipped Frame from Brooklyn Berry Designs (you’re here!)
Giant Reclaimed Wooden Clock from an Electrical Reel from The DIY Mommy
Beach Inspired Farmhouse Dresser Upcycle from Sustain My Craft Habit
Twig Houses from Life is a Party
Be sure to follow along on instgram, and share your own projects using #12monthsofDIY and #marchwoodworking to be featured!

Be sure to check out all of the projects in the 12 Months Of DIY series here!

Comments & Reviews
Lindi says
Love this transformation Brooke! Such a beautiful frame. I may just have to do this myself for an upcoming project 🙂
Heather @ New House New Home says
I love the fact that you don’t have to seal the Fusion paint. I did a dresser about a year ago and didn’t seal it. It still looks terrific and has held up well.
Brooke says
That is so good to hear! With 4 boys in the house we tend to go beyond normal wear and tear on coffee tables and end tables. They have to function as forts, driving tracks, and launch pads. I might have to repaint my coffee table with the Fusion Mineral paint!
Laurie @ Vin'yet Etc. says
I adore how this turned out! Now I want that white, it’s perfect! Your graphic is just perfect too, did you make that?
Brooke says
Thanks Laurie- I didn’t make the graphic, its a print that was given to me as a gift! I love the metallic letters though.
Thea says
I love, Love, LOVE this project! You have totally inspired me to create something similar. I will let you know if and when that comes. I also really enjoyed your narrative and how you explained the thinking behind the creating!
Ariel says
Very cool idea! I had never thought of colour blocking a frame like that. Great execution!
Joann MacDonald says
This is really so pretty. What a great idea! (speaking of hair in the paint, I got a “hair” from the brush on my table top and didn’t notice in the light of the garage so now I need to re-sand and paint! ouch!)
Dannyelle @ Life is a Party says
I love your project. I can’t get enough gold, and the dip effect worked out so well. Great job!
Sonja @ SustainMyCraftHabit says
What a creative and unique idea for updating an old frame. So fresh and I love the magnifique graphic too!
Christina @ The DIY Mommy says
This turned out beautifully! I love this dipped look, and I’m really looking forward to seeing how this paint holds up too. So far, so good!