You guys. Sometimes I have projects that take forever and I can’t seem to create the perfection that I have in my head. Or, I make the project and don’t really know what to do with it. NOT THIS TIME! Sorry, if you think that was yelling. It was actually me jumping for joy and squealing just a bit, because this is my favorite project ever and I didn’t get to keep it. So it is my pleasure to present to you….. the DIY GIANT CLOCK!
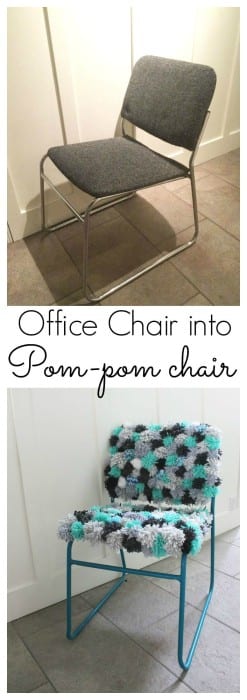
You see, every year I make a project out of items found at the Habitat For Humanity Restore. Last year I made the most adorable pompom chair (the week before I had a baby) and I have also made a photo display with a door. This time I saw this table and knew exactly what to do with it.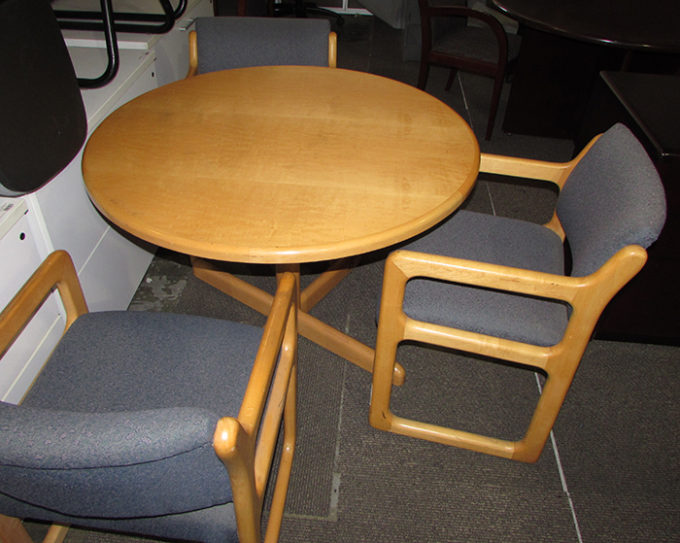
I was inspired by Christina at The DIY Mommy who made this fantastic clock for our 12 months of DIY paint month and when I saw that table I knew. I knew its potential. This table was meant to be a giant clock and I could help it become that. I looked underneath and sure enough the legs and base were just bolted into the top. Even better, the frame that supported the base would make it easy to hang the giant clock on a wall.
To make this DIY Giant Clock you will need:
- A giant wood circle. A dining table top or wire spool will work.
- Krud Kutter
- White Spray Paint
- Pencil
- Clock Numbers (you can print and resize the numbers I used here)
- Black vinyl or spray paint
- Cricut Explore & Accessories

DIY Giant Clock Directions:
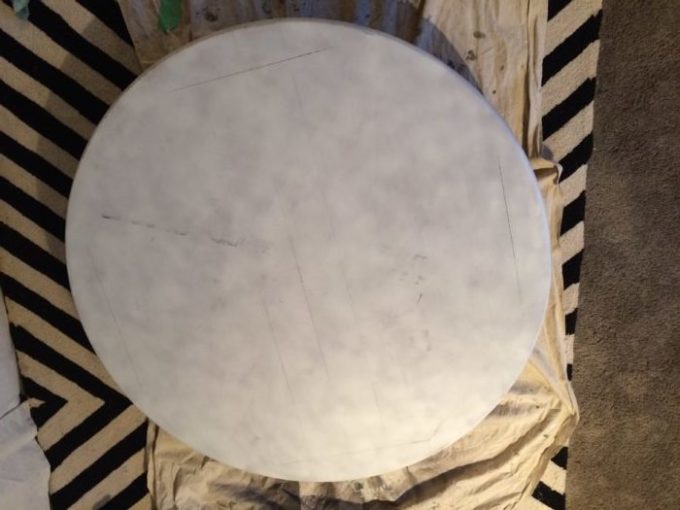
- Clean your table top and wipe it down. I like to use Krud Kutter as it preps the surface and is really easy to use.
- Spray paint your table top white. I spray painted the clock with rustoleum chalk paint in white.
- Distress, splatter, accent as you like. I used some gold metallic paint and brushed some gold streaks around the perimeter where the numbers were going to be.
- Draw shiplap lines with a pencil. Thats right. So easy. I also smudged my lines with my finger so they didn’t look too perfect.
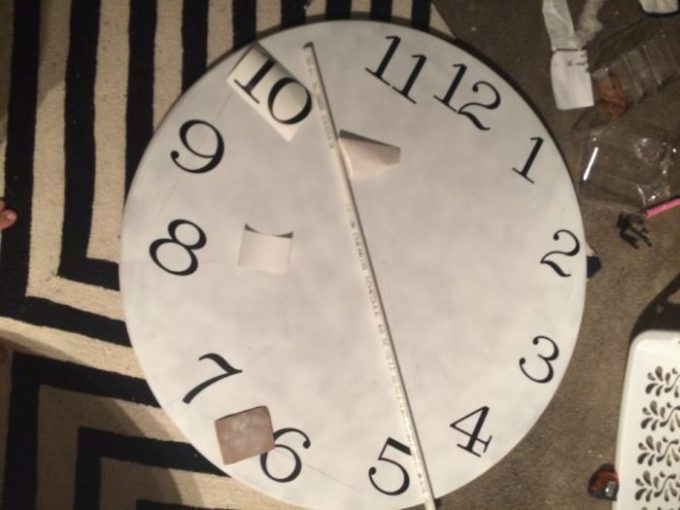
- Decide how large you want your numbers to be and how to arrange them. I started with regular numbers and was so happy with it, until it got to spacing. In order for the clock to actually tell time I measured out the numbers (I even pulled out the protractor to get those angles perfect). However, I placed the numbers centered on those lines and it didn’t look right visually. I spent a lot of time looking at clock faces to see how the numbers looked. At this point I decided I wanted this giant clock to LOOK awesome and not necessarily function as a clock. I also had a really hard time finding a clock movement and hands that would be big enough for a clock this size. In the end I re did numbers in roman numerals and rotated them around with the clock. Meaning the 6 is actually upside down, but it was accurate to the vintage clock faces I typically see. You will notice that the roman numeral numbers themselves are curved. This is one of those perfectionist things that I had to trial and error to figure it out. So, to learn from my mistakes I am sharing the images of the numbers for you.
- Cut out your numbers. I cut my numbers out of matte black vinyl using my Cricut Explore. You could also use the outside of the numbers as a template and paint them on for a more distressed / imperfect look. If you do not own a cutting machine, you could also trace the numbers and hand paint them. Whatever works for you!
Are you looking at clock faces and clock numbers for your clock? I saved the numbers I used and you can use them FOR FREE!
Download my curved roman numeral numbers for your projects HERE.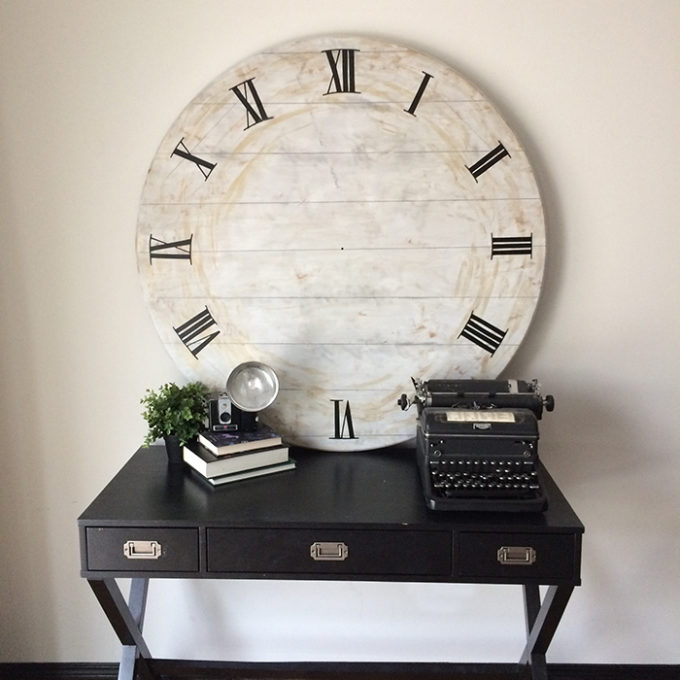
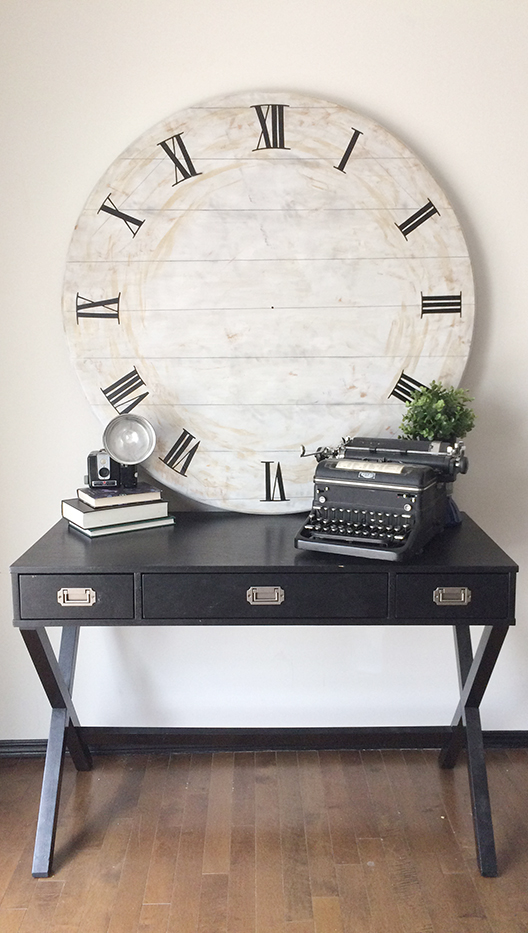
Now hang your DIY giant clock on the wall, or put it on a console table and enjoy!

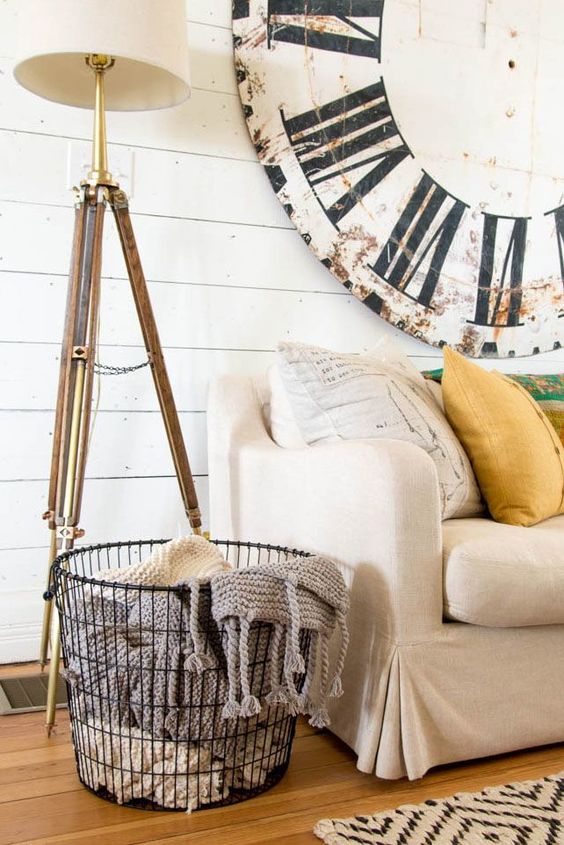
It turns out, this is one of my favorite projects I have made. Why? Because its huge and it was so inexpensive. I would love to hang a wreath on top of this at Christmas. Sadly, it went to the Calgary Home & Design Show to be auctioned of to raise money for Habitat For Humanity. However, I might have to remake this and keep it!
Does this clock look familiar? Since this clock has been donated and I have wished to make it again, I spotted it in a few pretty well-known interiors. Joanna Gaines from HGTV’s Fixer Upper has a similar, perhaps even larger clock in her home. It has more rust color and distressing. Possibly more inspiration for my next clock project.


Comments & Reviews
Dyanne says
Why did nt you use a clock kit to make it functional?
Brooke says
I still might do that. I had a really hard time finding hands big enough.
Elissa says
Thanks so much for the awesome info and download – I noticed that the four is incorrect. It should be IV not IIII. Thanks again!!