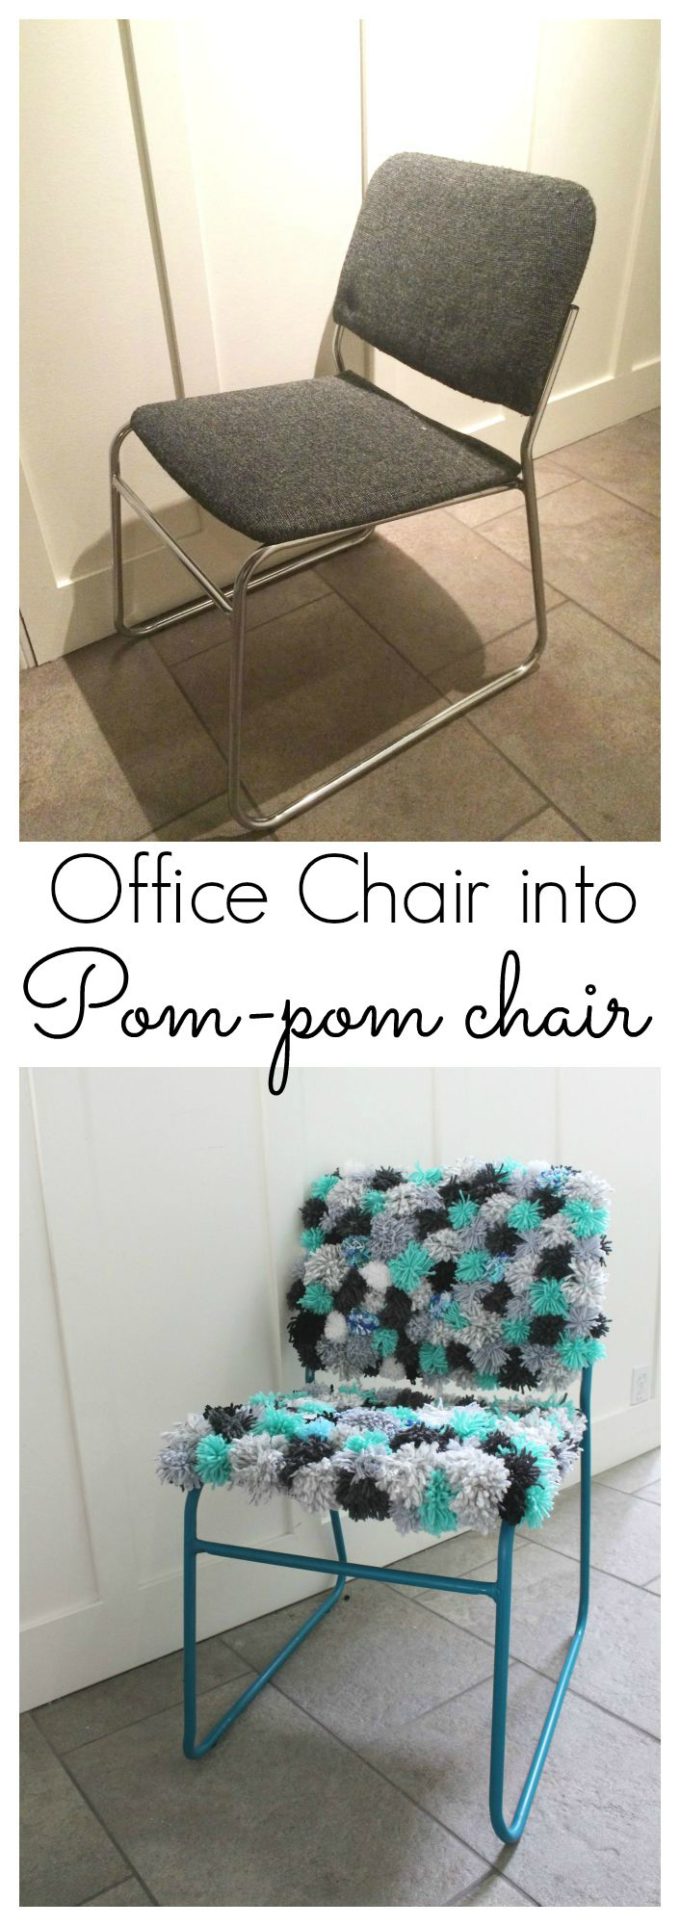
When given the task to use something from the Habitat For Humanity Restore and create a chair to be auctioned for charity, I had some decisions to make. Do you create something really bold and crazy that people are bound to talk about? Or do you make something really pretty and safe, that someone would actually buy which will raise the most money for the cause? Well, the end goal is always to help out the cause so I knew something in that would be cute but stand out would be my best bet.
I forgot to mention, I was 2 weeks away from having a baby and my husband wouldn’t have the time to help me. So it had to be a simple project in order to get it done in time.
Before
This is the plain jane office chair that I brought home with me. It has great bones, its just not something to get excited over.
There are so many great pom pom projects out there, and I have been really loving the pom pom rugs in the bright color combinations or ombre colors. I decided that a fun pom pom chair would be perfect for an office or a teen girls desk space.
I won’t get into a full tutorial, I am sure everyone has made pom poms before, but I will leave you with a few tips and tricks if you wanted to try this on your own.
- I made tons and tons of pom poms. Then more, then even more! It seemed to take more pom poms to make this chair than I ever realized.
- When tying the pom poms, leave the strings really long.
- Tie the pom poms onto a mesh sheet. I used a foamy shelf liner, the white one with perforated holes? That became my fabric of sorts to upholster the chair with. This helps the pom poms to stay sturdy in place and not fall off. I followed a tutorial from Say Yes on making a pom pom rug to get the general idea.
- Depending on how many pom poms you want to make, or how close you want them placed to each other you may want to glue some of the pom poms down around the edges. I found that it would look really full and once someone sat on the chair I would see bare spots that needed filled. I could do that over and over again, or you could ruffle the poms a bit, sort of like raking a shag carpet. It all depends on how much time you want to spend, how close you will be looking at it, and how much wear the chair will get.
After:
What do you think about the pom pom chair? Crazy or cute? I would love to know your thoughts!
If you love upcycling or DIY projects with found or repurposed items, you should check out these posts too!


Comments & Reviews
janet Trieschman says
Such a cool idea. I bet it is really soft to sit on. I would have never thought to do this.
Crystal @ Hello Creative Family says
Brooke this project is too cute! My daughter would love it so much. I think I’ll have to make one for her room in teal and pink, her favorite colors!
I included this project in a roundup of some of my favorite DIY and craft projects from people attending SNAP! I’d love for you to take a peek. You can find it here:
http://hellocreativefamily.com/27-diy-projects-from-creative-snap-bloggers/
Best Wishes,
Crystal
Abby says
Wow! I love it. Thank you for sharing