• Skip to primary navigation
  • Skip to main content
  • Skip to primary sidebar

Brooklyn Berry Designs

DIY and Design for Creative Moms

  • Family Fun
    • Games & Fun
    • Kids Crafts
    • Lifestyle
    • Book Shelf
  • Crafts
    • Laser Crafts
    • Cricut
      • Cricut Projects
      • Cricut Tutorials
    • Sublimation
  • Holidays
    • New Years
    • Valentines Day
    • St. Patricks Day
    • Easter
    • Mothers Day
    • Fathers Day
    • Summer
    • Patriotic
    • Canada Day
    • Back To School
    • Halloween
    • Thanksgiving / Fall
    • Christmas
  • Digital Downloads
    • SVG Files
    • Printables
  • Shop
  • Brooklyn Berry Designs
  • About
  • Press/PR
  • Blog
  • Shop

Crafts

Home » Crafts » Cricut Design Space – Slice Tool Tutorial

Cricut Design Space – Slice Tool Tutorial

Created On: May 29, 2018  |  Updated: July 13, 2020  |   2 Comments

Pin
Share
Post
180Shares

This post may contain Amazon and other affiliate links. Using these links, I earn a small commission at no additional cost to you.

For the most part I am a self taught cricut user, and have mostly picked things up with experimenting, trial and error.   However when the Cricut Maker was released I got to attend the launch event and learn tricks and tips from the designers and top crafters who are the pros.  I learned so many tricks and easier way of doing things, so I thought I would share some simple tutorials on using the design space tools.

How To Use The Slice Tool

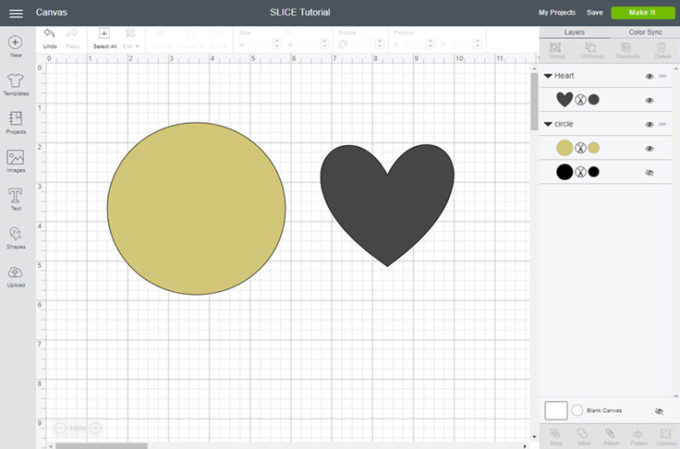
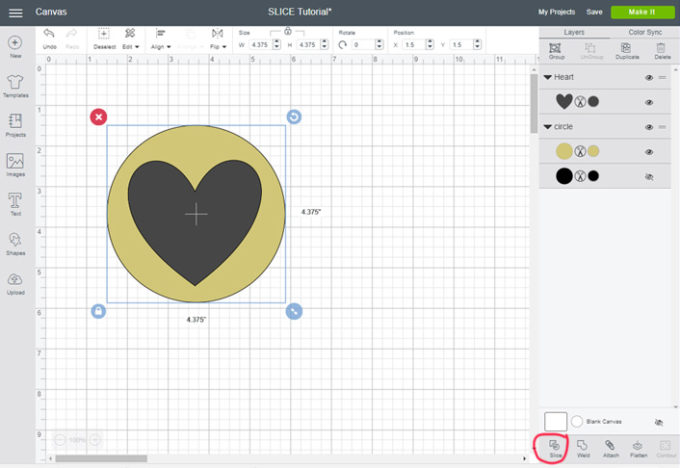
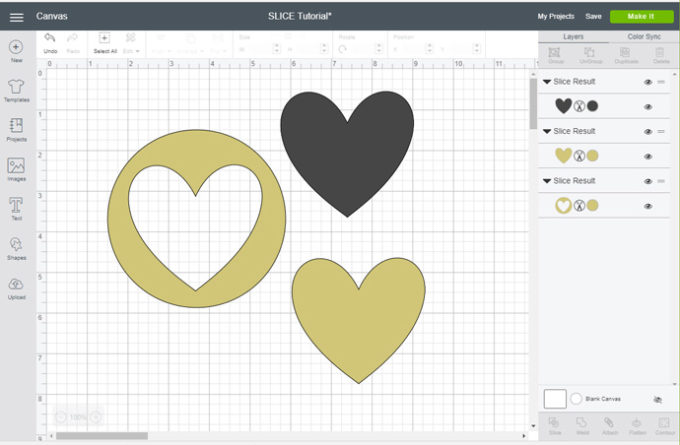
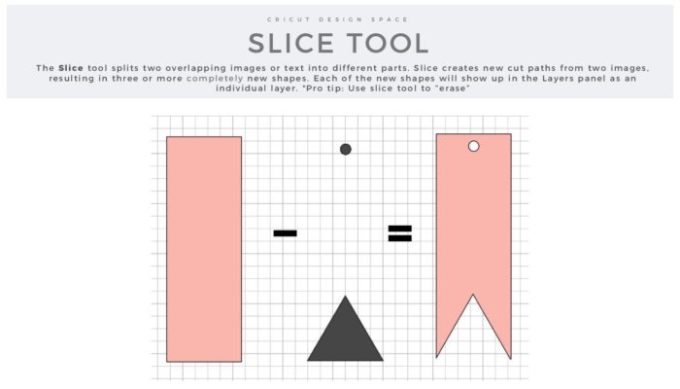
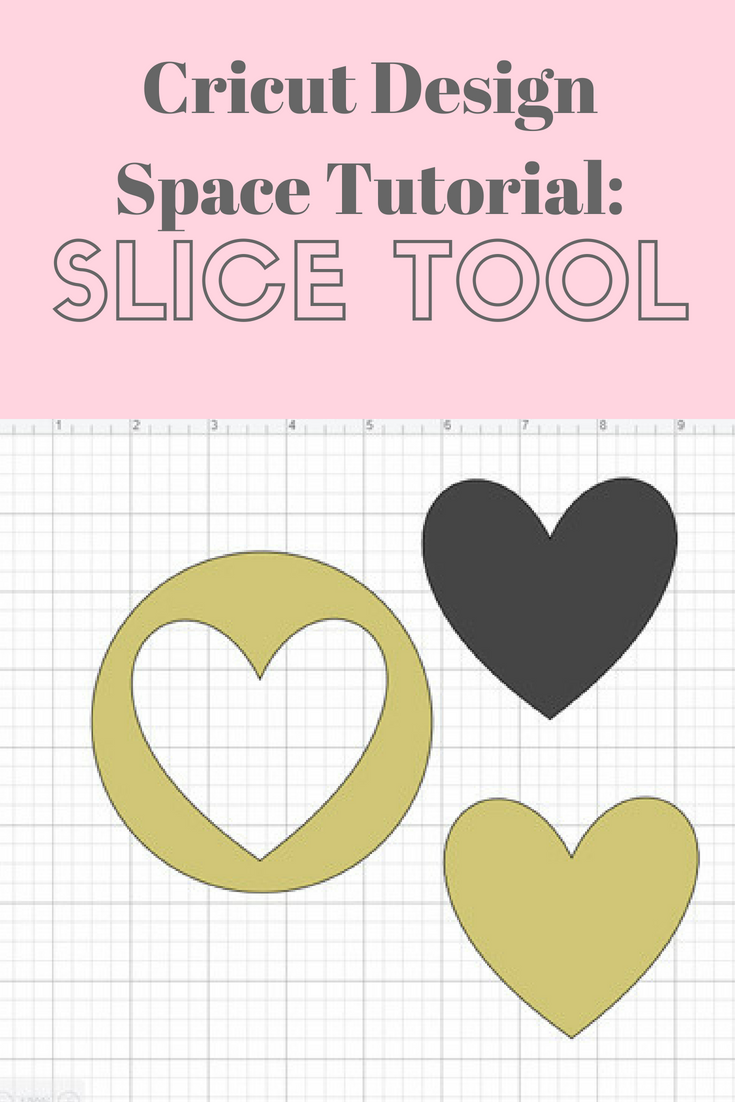
The Slice Tool splits two overlapping images or text into different parts.  The slice tool is like a cookie cutter, where it could take a circle cookie and cut out a heart shape from the middle.  After cutting you end up with a heart shape of cookie, and a circle cookie with a heart shaped hole cut from the middle. 

The slice tool can be used as an eraser, cutting out or erasing a shape from inside of another.  I used the slice tool to erase any sections of a design I don’t want to use (my first time doing this was with my dream catcher t-shirt where I wanted the feathers to be a different color – you can see what I am talking about by looking at the file in design space).

Helpful Hint:  You can only slice two layers at a time.  If you find yourself frustrated because the slice tool is grey and you cant select it, try ungrouping the layers. 

When To Use The Slice Tool

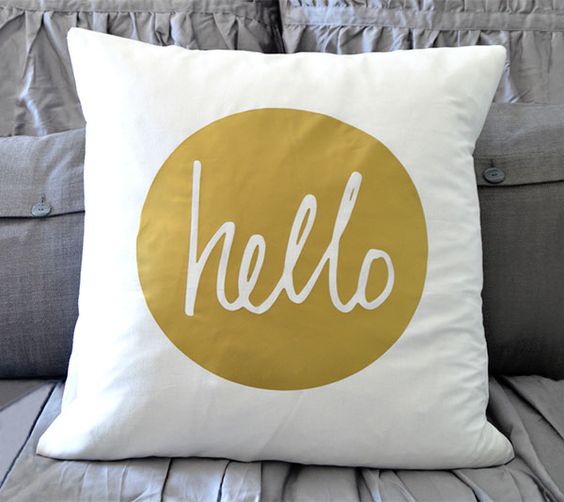
The slice tool is used as an eraser, like I mentioned before.  The slice tool is best used for creating your own shapes and design. The Hello Circle pillow shown here could be easily customized to have a kids name, last name, or saying. Simply start with any shape and any image or word and use the slice tool to remove it.  For advanced slicing techniques, look at the Knockout Method Tutorial (I will have one soon!

This split level monogram is available on Etsy, and you could create your own too!

Here are some other Cricut posts you should check out:

Cricut Hacks

Cricut Explore Guide – All the FAQ

All Cricut Projects

Pin for later:

Pin
Share
Post
180Shares

posted in: Crafts, Cricut Tutorials

Previous
How To Get Your Home Ready To Sell
Next
Sew Doll Clothes With Cricut Maker

Reader Interactions

    Leave A Reply! Cancel reply

    Share your thoughts!
    Your email address will not be published. Required fields are marked with *

    RATE THIS!


    This site uses Akismet to reduce spam. Learn how your comment data is processed.

    Comments & Reviews

  1. Barbara Ferguson says

    March 4, 2022

    Thank you so much Brooke, you explained the Slice Tool so I could finally learn what it is and how to use it. I feel like I have learned something very useful for the first time all day.

    Do you do a lesson on Contour? I’m still struggling to wrap my head around that one.

    Reply

Primary Sidebar

Brooke - Author of Brooklyn Berry Designs.

Brooke is an interior designer and DIY’er who loves all things creative and crafting. She loves to be busy with at least 3 projects on the go and is constantly chatting or singing along to the radio. As a mom to 4 boys, she is always blending creativity and chaos, with some diet coke mixed in. Stick around for the big projects and get 20 little projects in between.

More About Me

Step By Step Guide To Your Cricut!

Level Up Your Cricut Game - Become a pro in 5 days with this free Cricut email course.

Thank you for subscribing!

Let's Get Creative

Subscribe to get free SVG files, Cricut and laser cutter tutorials, fun printables, and easy crafts right to your inbox! Its free!

Thank you for subscribing!

Featured Projects

  • Customize With Cricut Design Space Tools
  • Best Cricut Access Fonts
  • make your own canada 150 waterbottle
    How to upload your own images with Cricut
  • How To Upload A SVG File To Cricut Design Space

Let's Get Creative

Subscribe to get free SVG files, Cricut and laser cutter tutorials, fun printables, and easy crafts right to your inbox! Its free!

Brooklyn Berry Designs Logo

About

  • Brooklyn Berry Designs
  • About
  • Press/PR
  • Blog
  • Shop

Topics

  • Crafts
  • Cricut Projects
  • SVG Files
  • Printables
  • Cricut Tutorials

Holidays

  • New Years
  • Valentines Day
  • St. Patricks Day
  • Easter
  • Mothers Day
  • Fathers Day
  • Canada Day
  • Back To School
  • Thanksgiving / Fall
  • Halloween
  • Christmas
©2025, Brooklyn Berry Designs. About Press/PR Back To Top
Design by Pixel Me Designs
×

Let's Get Creative

Subscribe to get free SVG files, Cricut and laser cutter tutorials, fun printables, and easy crafts right to your inbox! Its free!

Thank you for subscribing!