Wallpaper has made such a grand entrance into the design scene, its only fitting that people have started experimenting with it beyond the typical uses. Rather than hand painting an intricate pattern onto a piece of furniture, wallpaper patterns can be cut out for the design, or even the entire drawers covered with wallpaper. Wallpaper is moving off the wall! I decided to make a fun dry erase art wall for my boys to use in our basement play room.
I have been trying to find the right paper to try this for a while. In May when I was looking for mod podge projects I couldn’t find the right paper to match the decor of the twins bedroom. Eventually I found this great frames wallpaper on Wayfair and I knew right away what I wanted to do with it.
While I could have applied this wallpaper straight to the wall, I really wanted to create a dry erase finish on top of the wallpaper so the doodles and drawings could be washed away and colored again. There are two ways I could think of to keep the image of the frames but make them erasable. I could put the wallpaper into a picture frame, or find some way to put glass overtop of the wallpaper. I have seen hardware that can be used to offset the glass from the wall, and it works great for framing fabric or other artwork. The problem I had with this is that the glass gets really thick, which makes it look weird when you are coloring on top of the pattern. If you wanted just a custom color background for a coloring surface, this soloution would work just fine.
I searched everywhere for a treatment that was clear that would allow me to use this paper. I debated mod podge, but couldn’t find a formula that could do this. I looked at paint – chalkboard paint, whiteboard paint, etc. Nothing worked. I finally found Dry Erase from Rust-Oleum and I was so relieved. It comes in two liquids that you mix together and roll on like paint. Way to save the day!
DIY Dry Erase Art Wall
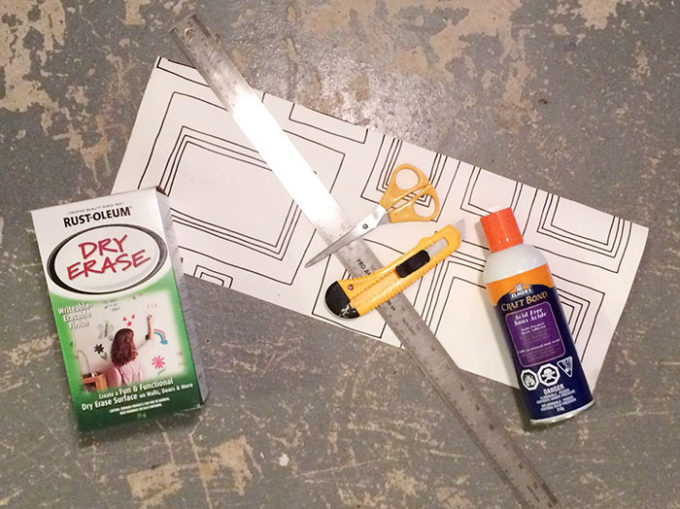
- Gather supplies – ruler, utility knife, adhesive, scissors, wallpaper, and dry erase paint.
- Cut wallpaper to size of foam board, leaving about an inch on each side.
- Apply wallpaper to foam core board using adhesive of your choice (I used spray adhesive but mod podge would also work).
- Trim edges of paper with utility knife
- Apply dry erase paint – follow directions on the box, it will be painted on.
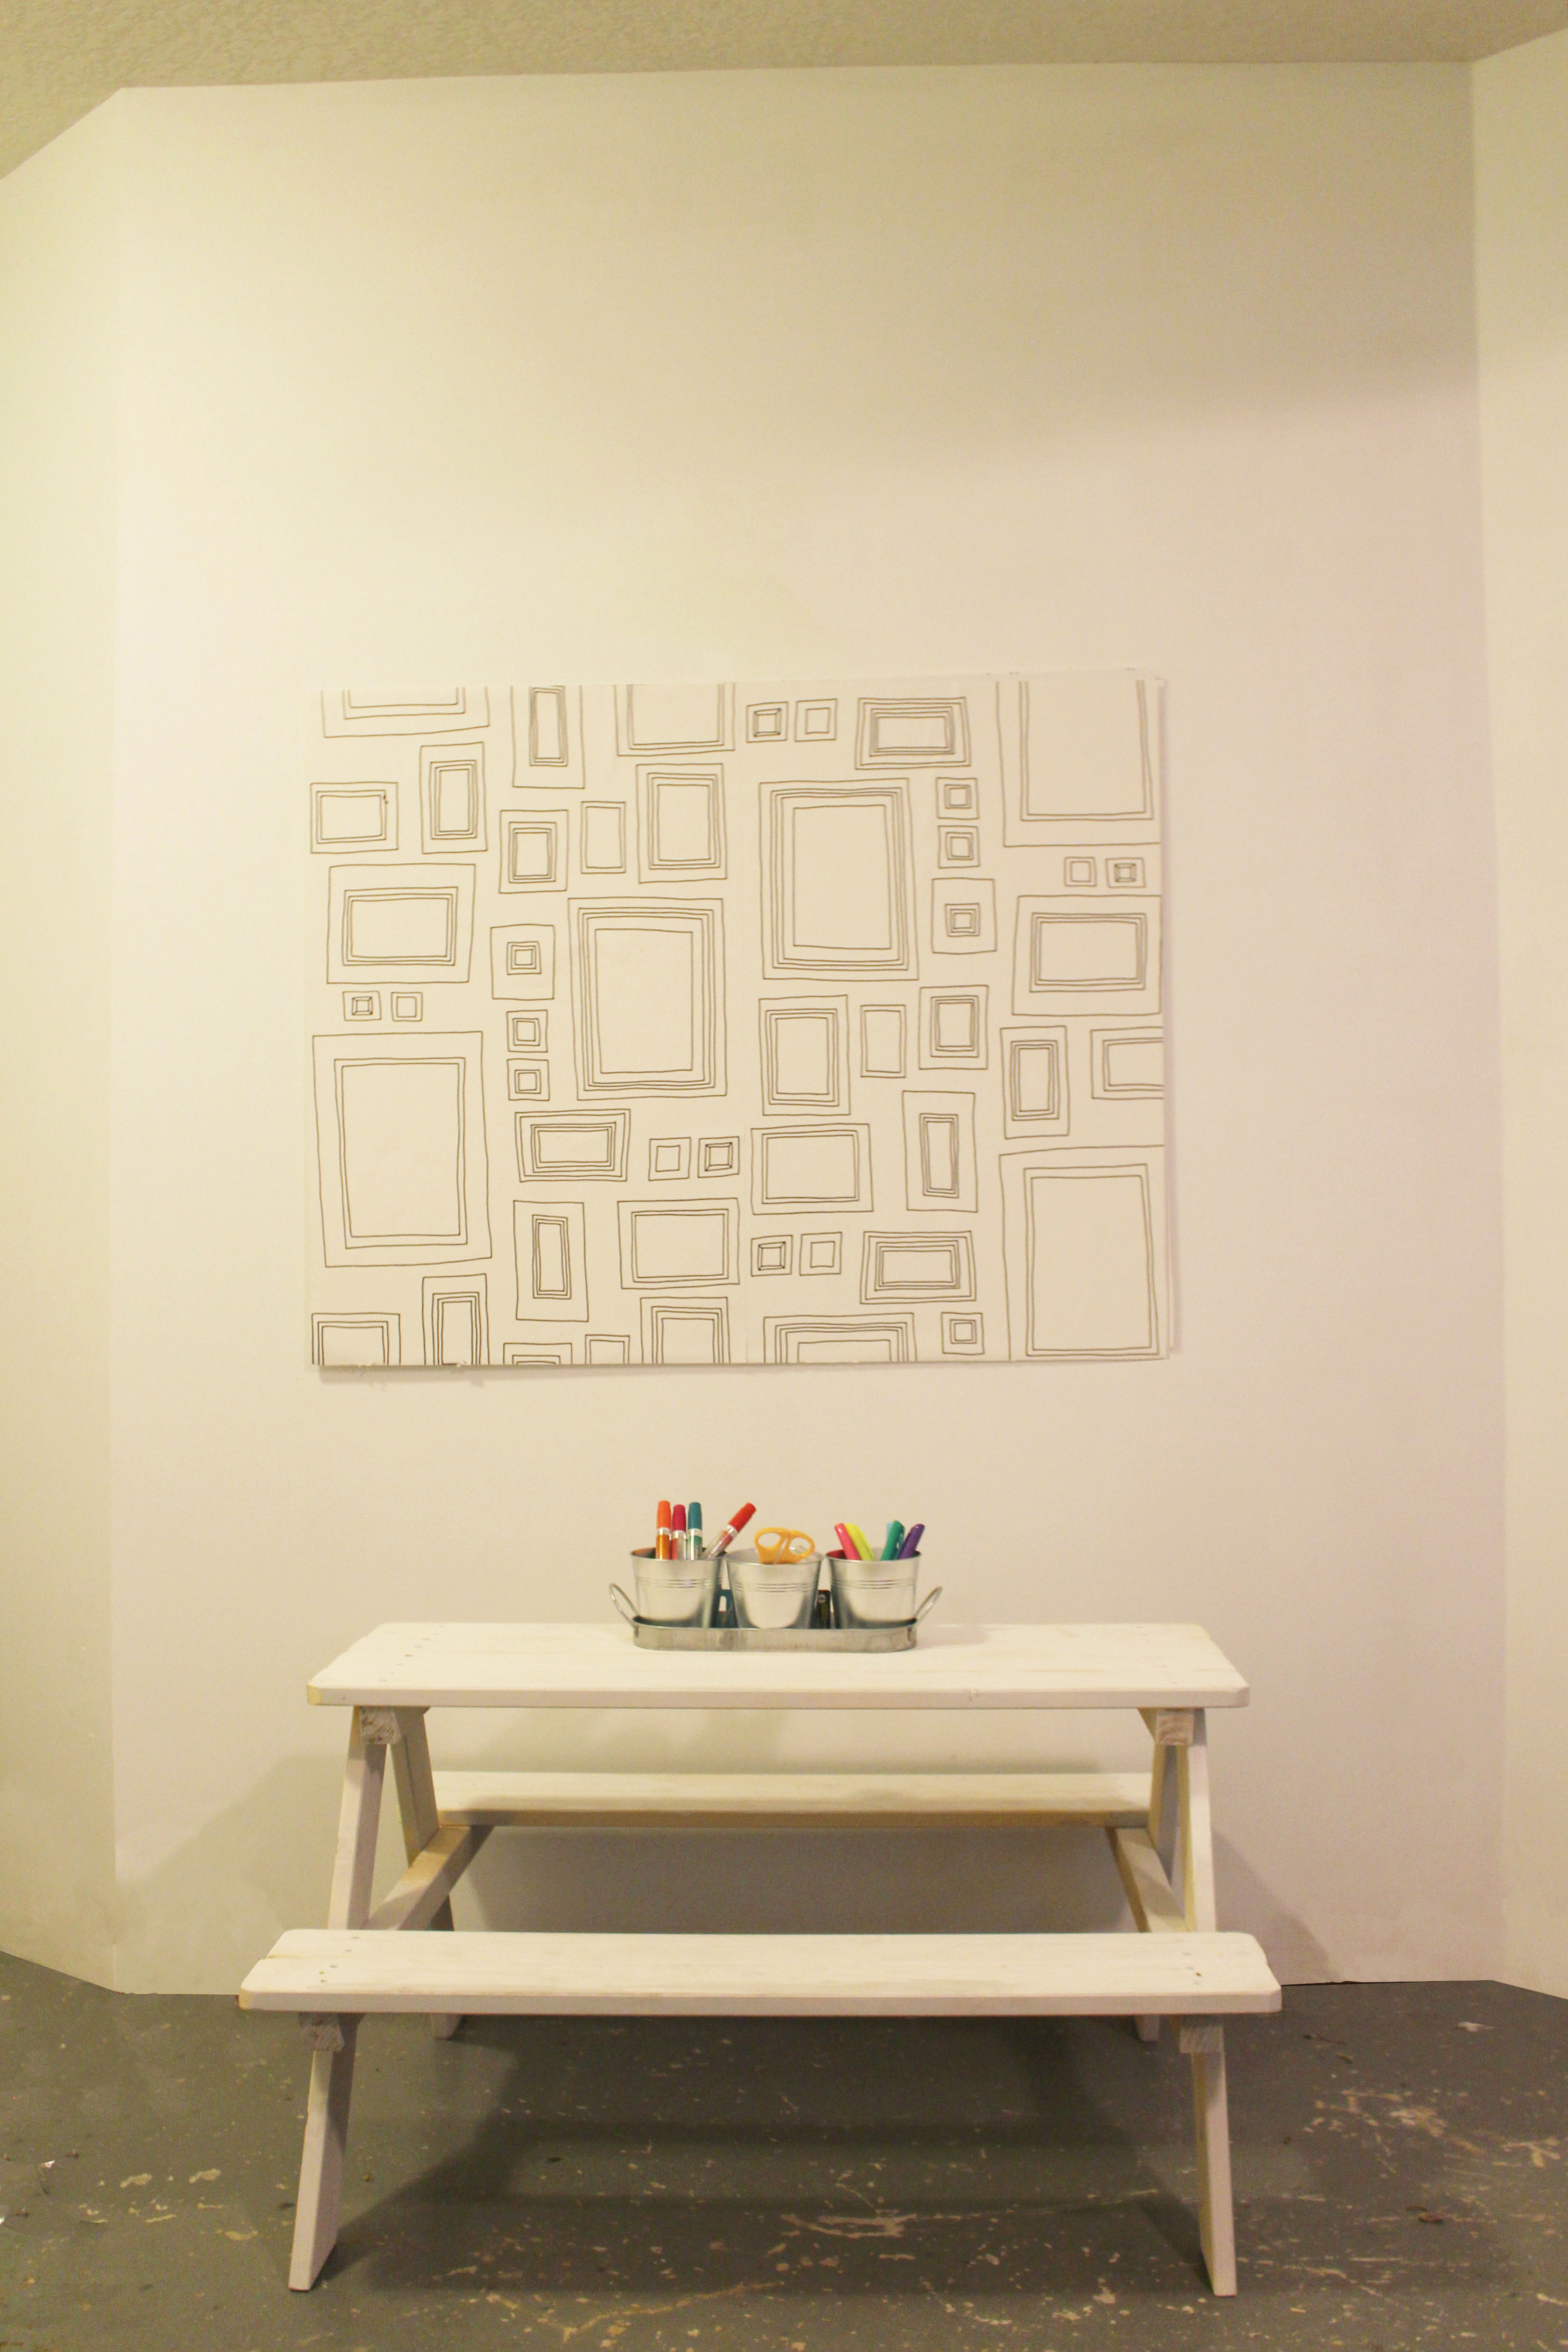
- Let it dry at least 2 hours.
- Add hardware to hang the board. I used an alligator clip pushed right into the foam board with some glue just in case.
- Hang to the wall and enjoy!
Because this wallpaper was applied to a board, I can move it around my home, or take it with me if we move. This is a perfect idea for renters who want to add some personality and design to their home without getting into trouble with their landlord. Also, this frames wallpaper is not prepasted, so if you are looking to install it directly to your wall, be sure to purchase some wallpaper paste.

Comments & Reviews
Heather says
This is so cool! My kids would love it.
Brooke says
Yes they would! The dry erase paint is fantastic – you could make your own frames with vinyl or sharpie, or even just a painted wall!
Kyla says
ARE YOU FREAKING KIDDING ME. THAT IS SOOOOOOOOOOO AWESOME.