Make your own personalized cutting boards with Glowforge! Perfect for any occasion, these custom cutting boards are great for wedding gifts, housewarming gifts, or any occasion you need a gift for.
The engraving feature is one of the most popular functions of the glowforge and I was so excited to try it myself. Needing a wedding gift for a coworker, I saw the perfect opportunity to try a new project.
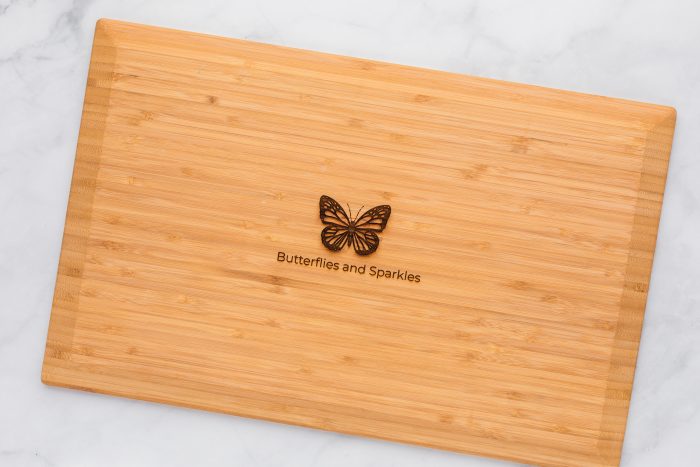
Engraved cutting boards are the most versatile laser project. Realtors could give a house warming gift with a drawing of the house outline on it. Wedding gifts could have the name, monogram, or date of the wedding. A family recipe can be engraved into a cutting board for a sentimental gift for any friend or family member!
Looking for more information on the Glowforge? Check out my Glowforge Guide to everything you need to know before you buy.

Not only can the design be changed to fit any occasion, but the boards are also pretty quick and easy to make. This laser cutter projects would be a high quality item to sell for any small shop owners!
Personally, I like to add the design to the top of the board and leave the backside (with the juice groove) untouched for chopping. This way the recipient can choose to have it be a functional cutting board or decorative.
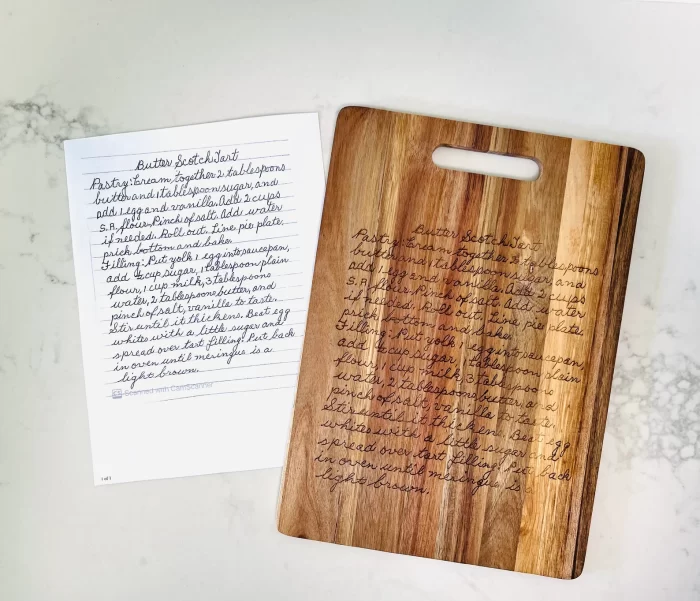
Engraving A Handwritten Recipe
A beautiful and sentimental gift idea is engraving a handwritten family recipe on a cutting board. This requires you take a photo of an old recipe hand written (preferably in a script style cursive for that vintage look) and convert it to an SVG file that your machine can engrave.
How To Convert An Image To A Vector
There are many ways to convert a recipe to a vector image, but the easiest would be to take a picture of the recipe. Edit the image in any app to crop it as close as possible. Adjust the brightness to reduce any background texture. I use adobe illustrator as my program of choice, but you can also use Silhouette Studio or inkscape.
Open the image of your recipe and choose image trace. Select view: traced result so you can see the end result. Check the boxes for “ignore background” and preview. Adjust the threshold until the end result is smooth. Once you have everything looking the way you like, click on object expand.
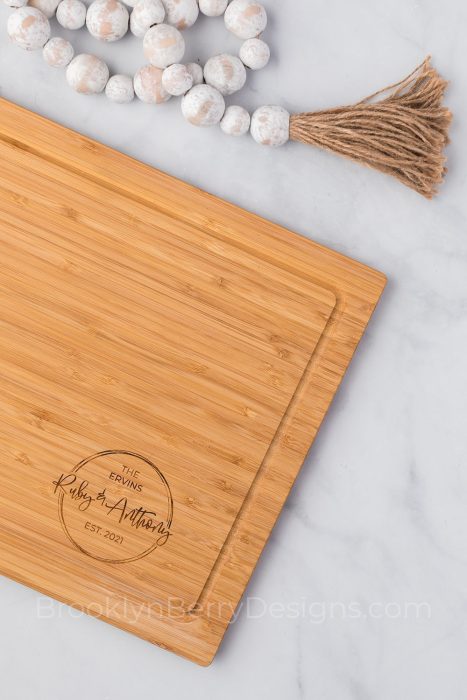
Custom Wedding Gifts
A friend of mine was struggling to come up with the perfect wedding gift for a coworker of hers. The recipient lived in another country, so the gift would need to be something easy to ship without breaking. The couple was more established and wasn’t in need of any specific item. While looking for my next glowforge project we decided to customize a bamboo cutting board for them!
Removing The Crumb Tray
When engraving or scoring on thicker items (anything over 1/2″ up to 2″ thick), you will need to remove the crumb tray to fit the item into the machine. In order to keep the board within the focus range of the laser, you may need to adjust the height of the item you are engraving by placing another small item underneath it inside the machine.
Remove the crumb tray by lifting the lid and tilting the front door down. Make sure you are pulling it straight back, rather than lifting up, as you don’t want to hit any parts of the laser, rails, or other sensitive parts (haha).
How High Should The Board Be To Laser?
There are a few options and tools that will help you with this.
If you want to wing it, just stack two cutting boards together. The thickness of the cutting board is just thinner than the crumb tray so this tends to work out just fine.

If you want a more precise measurement to determine the ideal placement for the ideal focus height – use this no math ruler. There is a free file HERE that you can laser print on any material.
Place a book, plywood, cork coaster, or another item underneath to get the top surface of the cutting board within the best range on the ruler.
Tips and Tricks For Placement
If you are placing a design in the bottom corner of your cutting board, try physically placing that corner of the board as close to the center of your machine. This helps prevent an alignment issue and keeps everything in focus.
When using the Glowforge App Software, place your vector images and choose the Set Focus from the menu. Select the area of the cutting board you want your design for it to focus on. This will help determine the engraving settings.
Laser Cut File for Cutting Board Designs
Here are some great files to use to engrave your cutting board:
How To Engrave On Bamboo Cutting Board
- First, remove the crumb tray from the glowforge machine.
- Apply masking tape to your cutting board. Use a brayer to ensure it has adhered as much as possible.
- Position the cutting board within the the focus range of the laser.
- Place cutting board in Glowforge.
- Add your artwork to the App software.
- Set focus on the area of the board to be printed on.
Settings To Engrave Bamboo
I used a speed of 1000, power 100. I like to buy a small board if there is an option of getting a set just to test settings.
How To Clean and Treat Your Cutting Board:
- Wash with dish soap and warm water
- Coat with food grade mineral oil.
Looking for more Glowforge Projects? Here are some ideas to get you started:
Happy Crafting!

Comments & Reviews
Tanis says
What a cute and personalized gift idea!!!